Help Guide
Support is available 7 days per week
eNotify provides private and secure direct local notification for incoming email & SMS notifications. Highly configurable, eNotify supports complex rules with custom alert sounds for different accounts, senders, subjects, recipient addresses, phone numbers and more. Easily silence day-to-day background noise and stay aware of those important email and SMS messages.
Chapter I: Settings
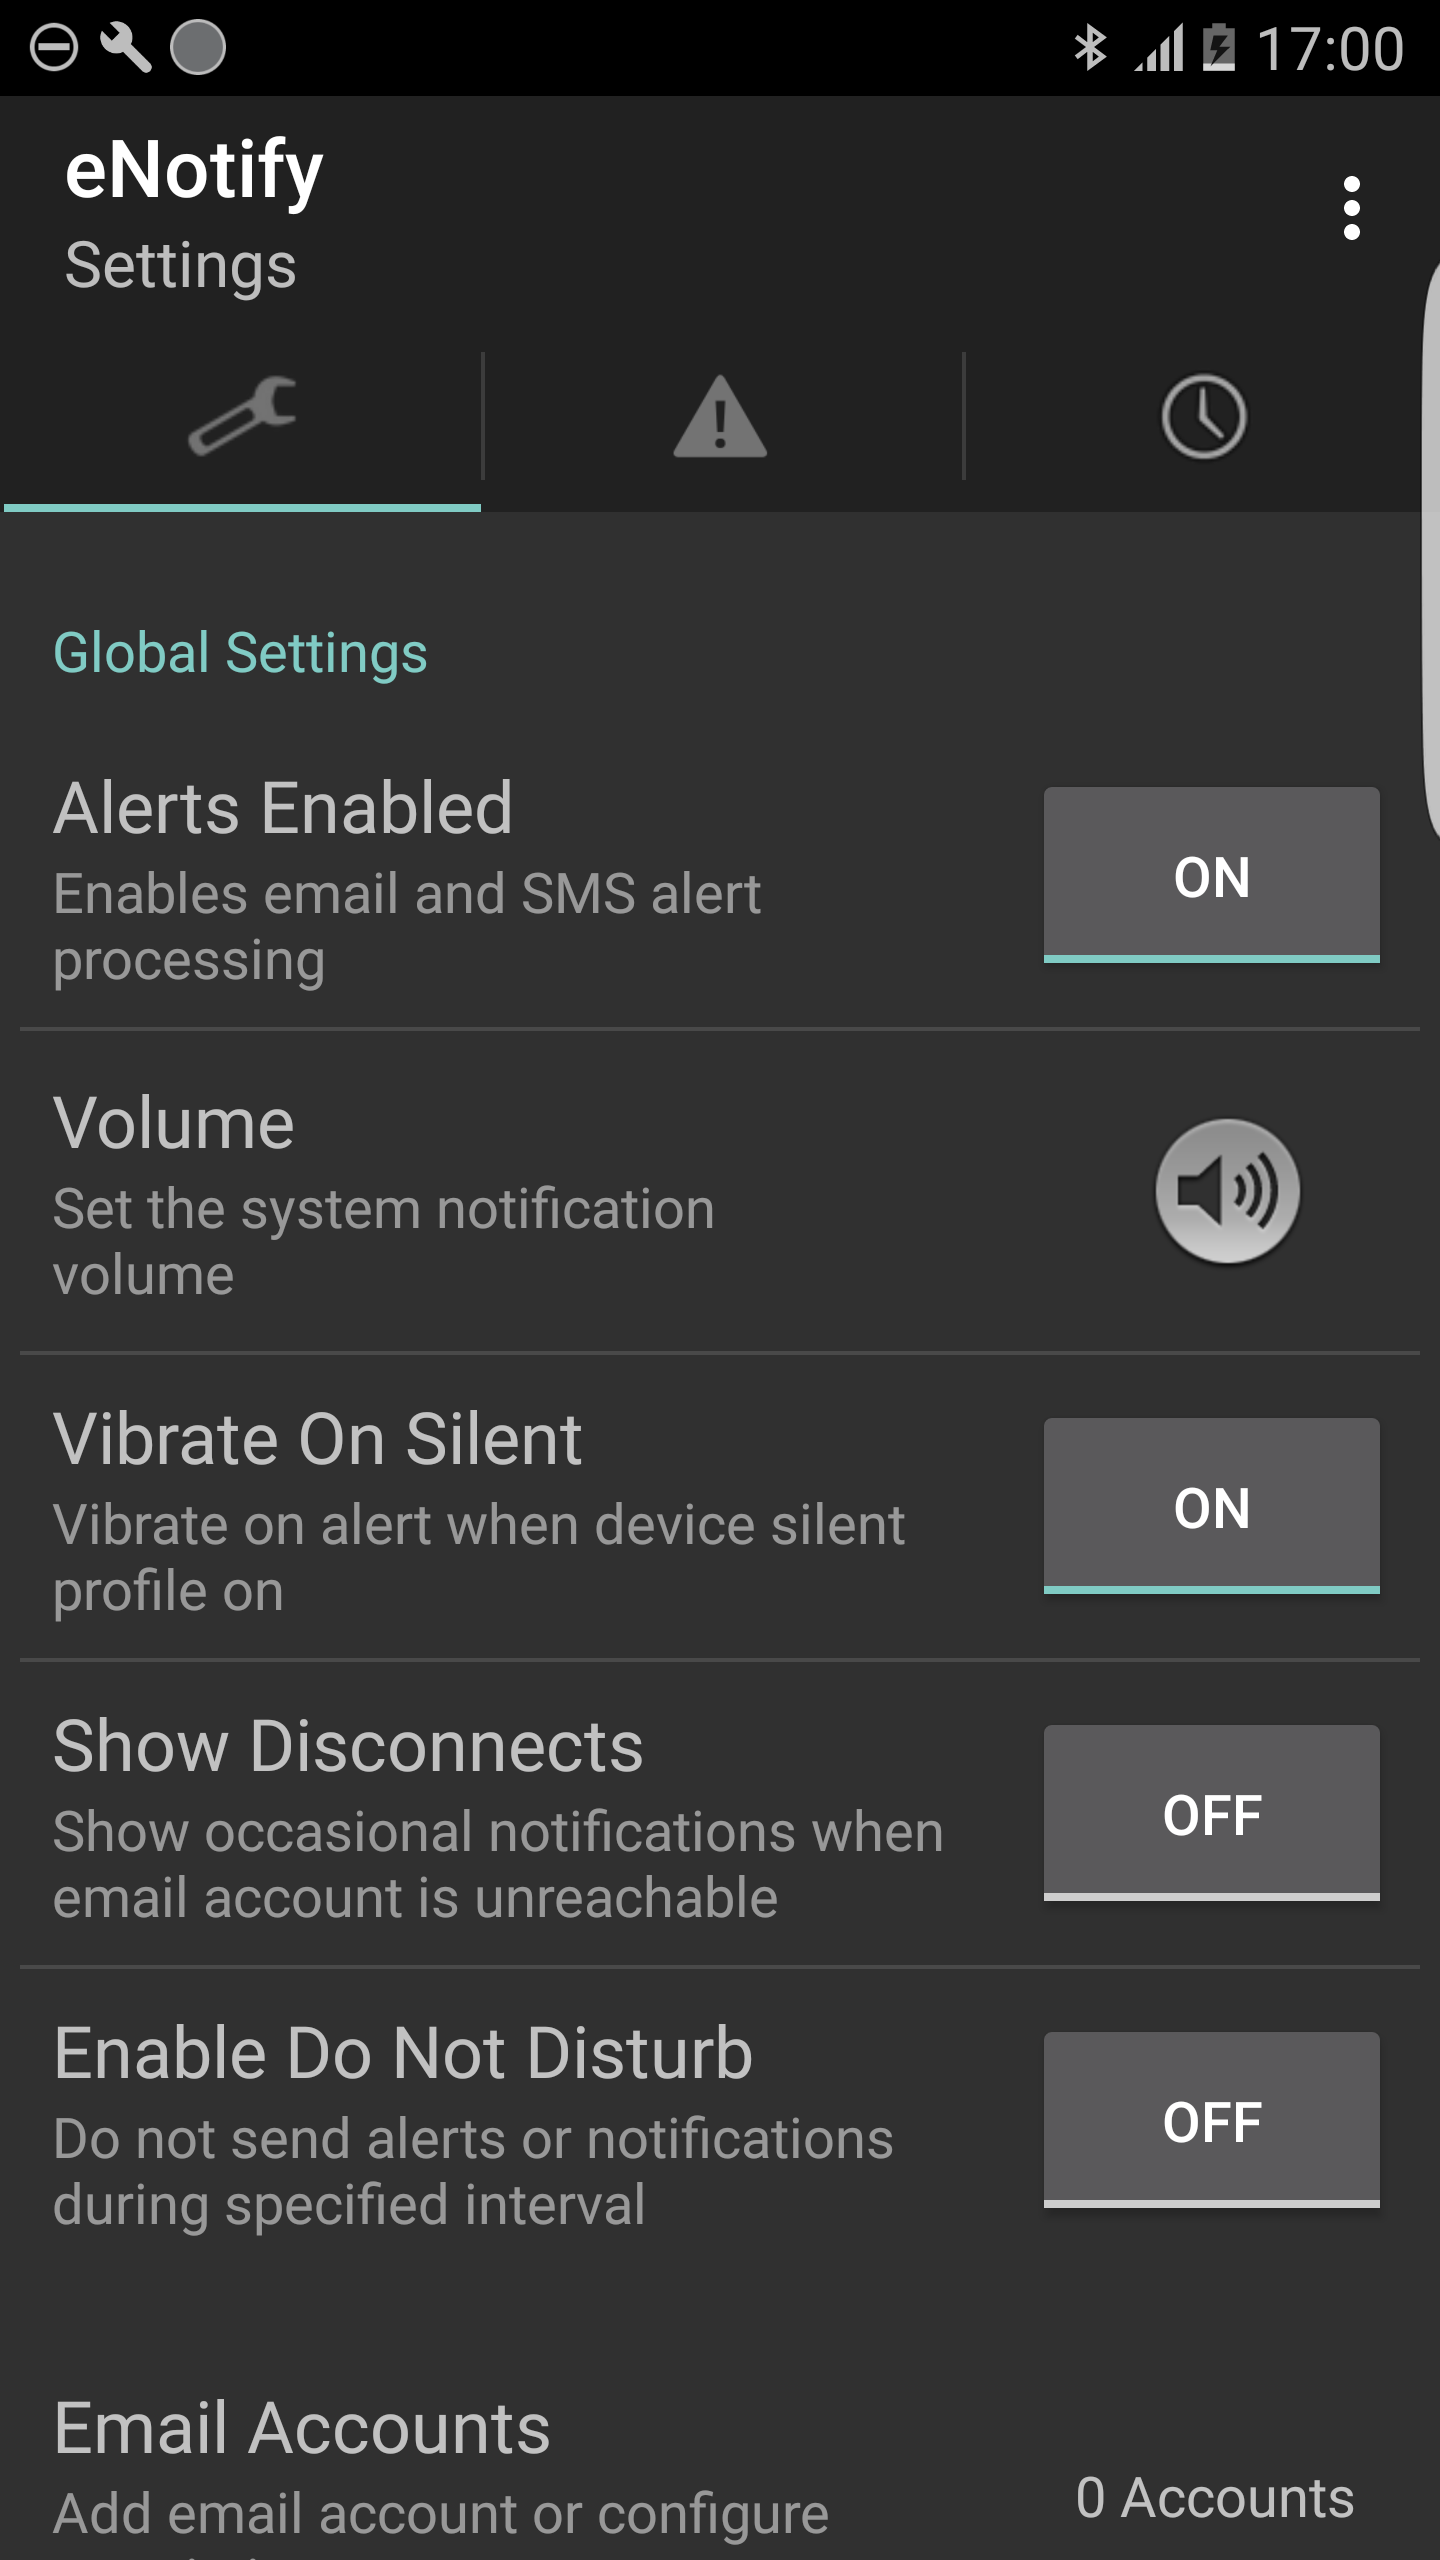
Alerts Enabled
When set to off, all alerts are disabled: {Email, SMS, ...}. This causes all alert processing to stop. For email alerts, the remote mail server will not be contacted. Alert processing immediately resumes when turned on.
Volume
Volume takes you to the system settings where the volume can be set. By default, eNotify uses the 'notification' sound channel. Tip: In the 'Advanced' menu, you can change the sound channel to another channel of your choosing such as the 'music' channel for example.
Vibrate On Silent
when "On", if your device profile is set to "Silent" or the device volume is 0, the alert will vibrate. This is a global setting for ALL alerts. However, you can also override silent (And vibrate) for a particular alert by turning on "Override Silent" for that individual alert
Show Disconnects
This lets you know when we are having trouble connecting to your email servers. During the course of the day, your internet connection typically has brief outages. These are just FYI messages that are nothing to get worried about. The notices will be sent to both the system notification tray and the pop-up notification if it is turned on. We only inform you after several connection attempts have failed. Once informed, we wait for a greater number of fails each time before informing you again. This prevents receiving "too many" disconnect notifications.
Enable Do Not Disturb
This enables you to set a global do not disturb time for all notifications. When do not disturb is in effect, eNotify continues to process your mail, but it does not issue any notifications. The messages will be ignored. Note: You can also add schedules to your alerts. For example, only fire the alert between 8am and 5pm. Schedules may be added to any alert other than the pre-created default alert. It is a similar concept. Schedules say which times an individual alert is allowed to fire. On the other hand, the Do Not Disturb specifies a period under which no alerts are allowed to fire. To be crystal clear, The 'Do not disturb' takes precedence over individual alert schedules. For example, if an alert is scheduled to fire between 8am and 5pm, and an email comes in at 1pm, BUT the the 'Do Not Disturb' is in effect, the alert will not fire.
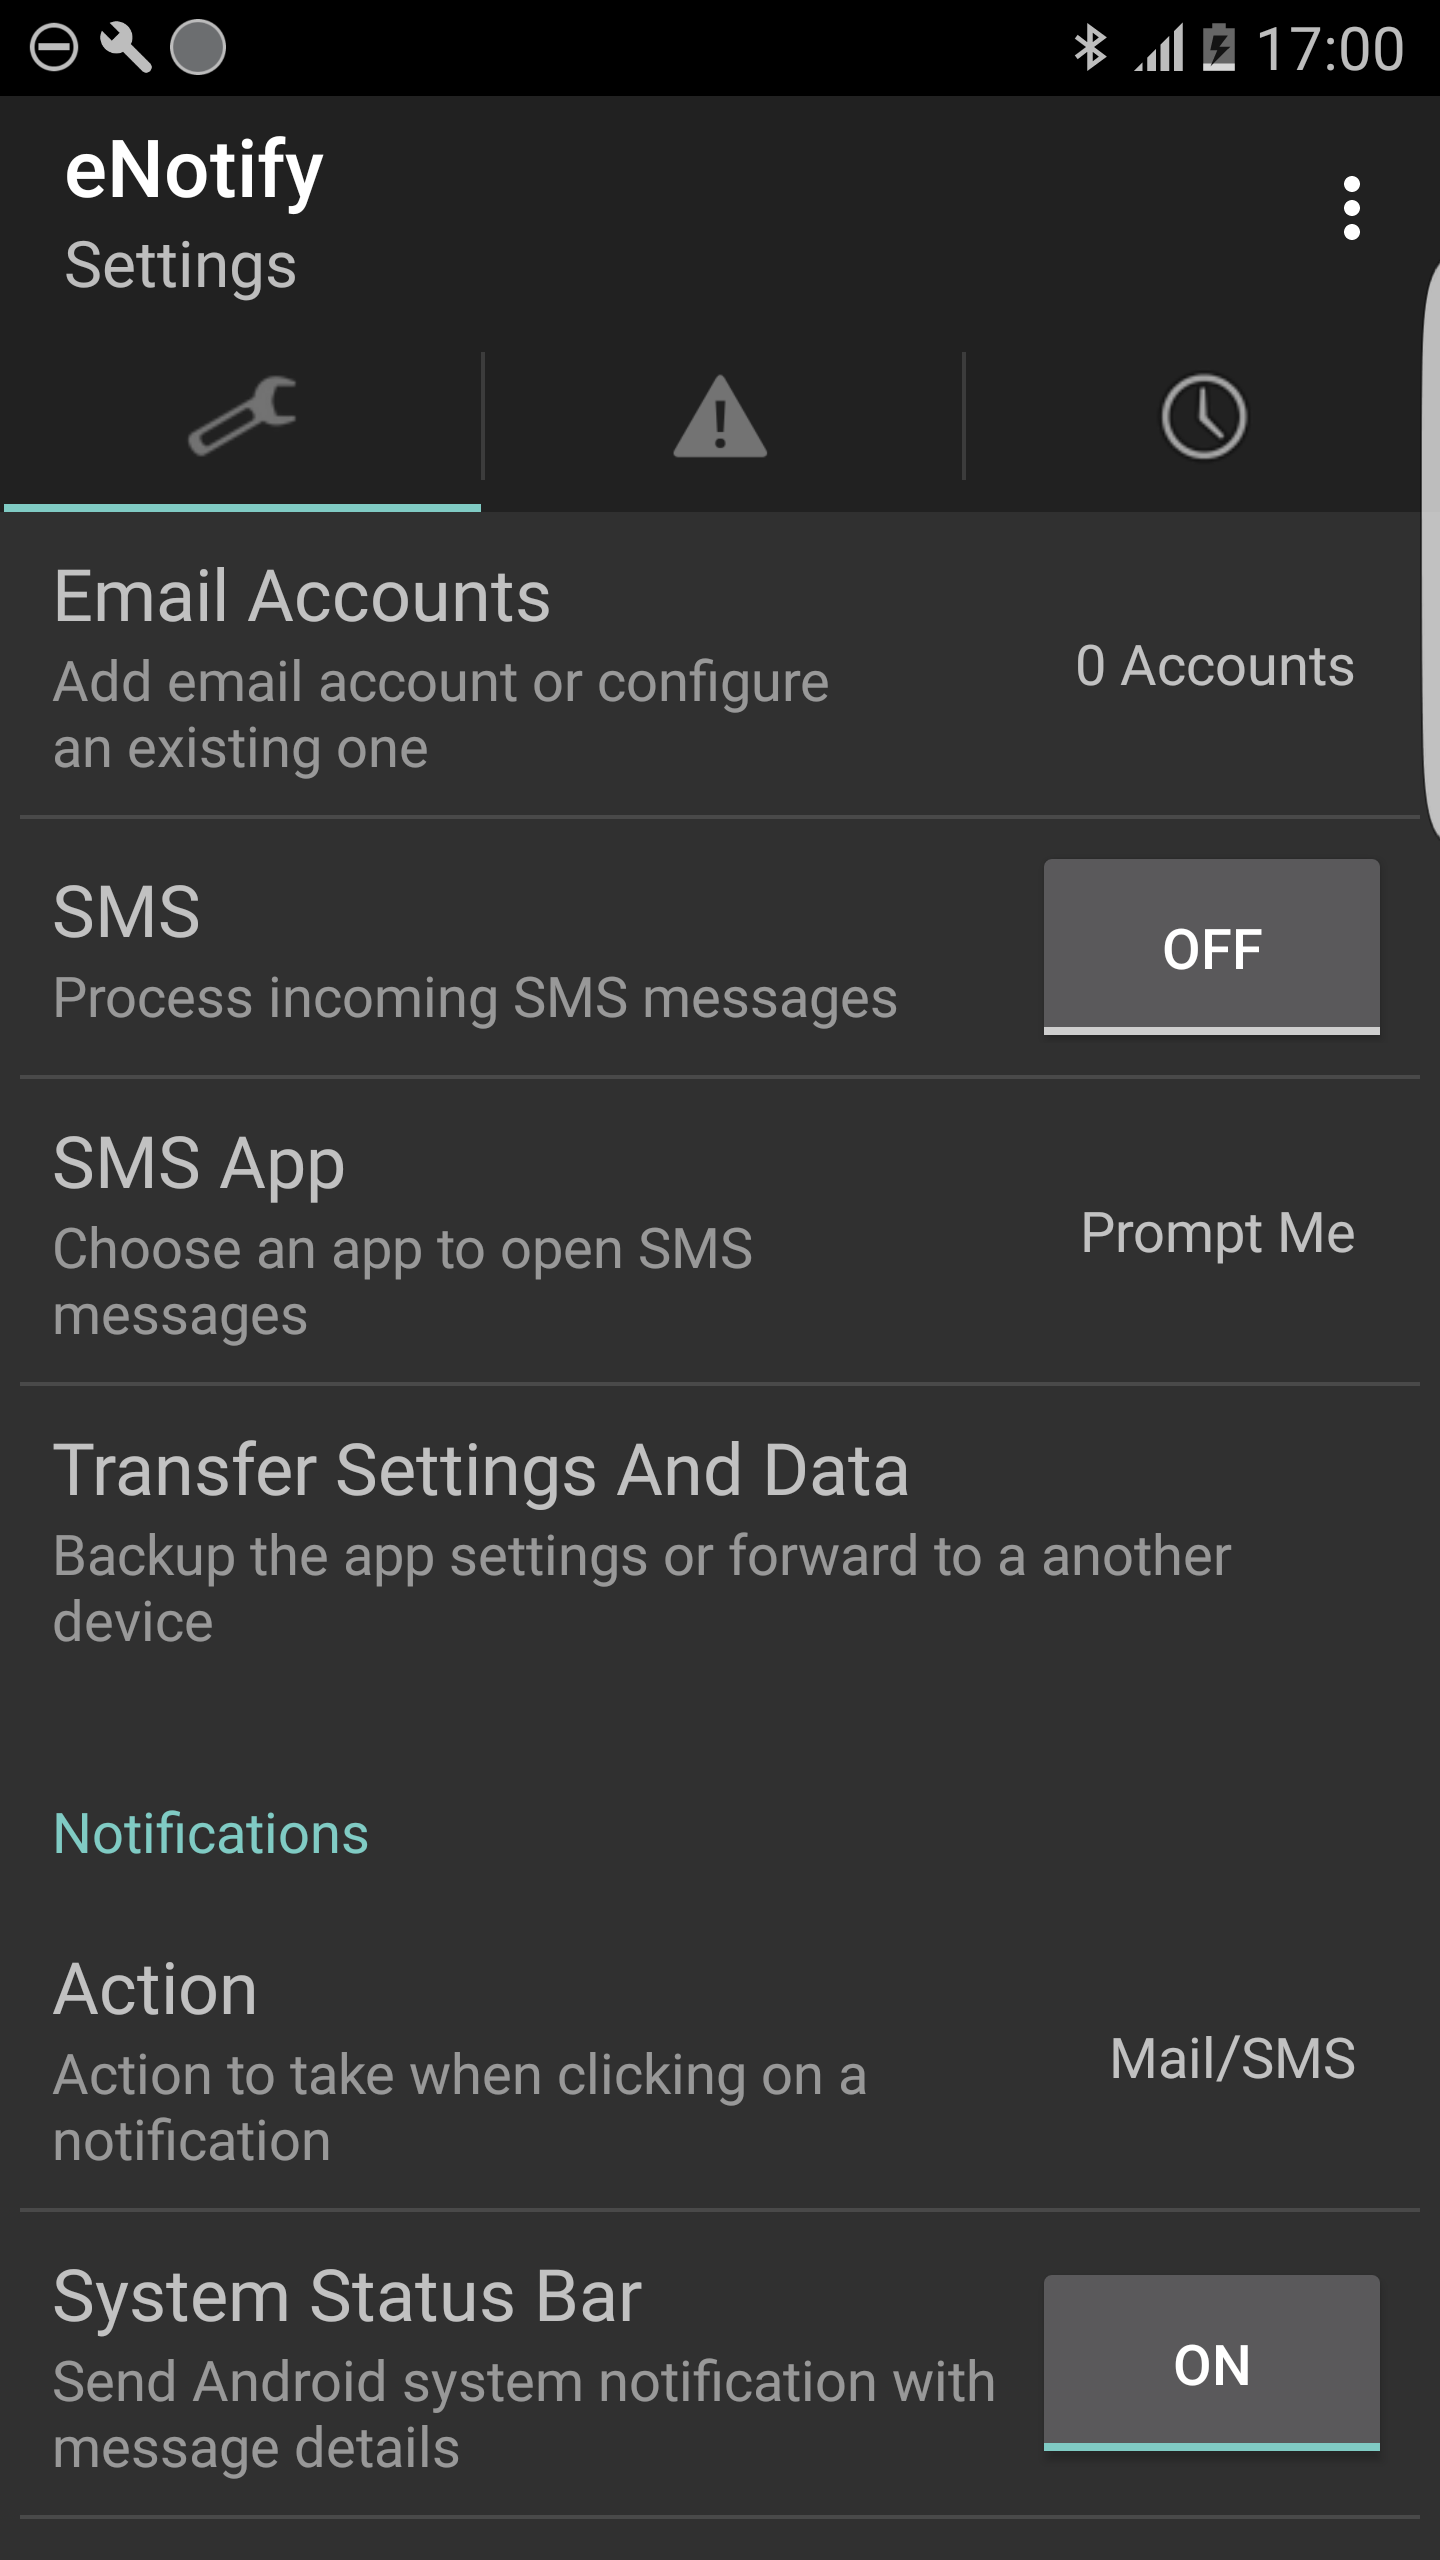
Email Accounts
Tap here to add email accounts. Alerts for email messages can be specified under the Alerts tab.
SMS
Turning this on enables eNotify to inform you of new SMS messages. You will probably want to turn off the notification alerts in the system messaging app to avoid receiving multiple notifications. Alerts for the SMS messages can be specified under the Alerts tab.
SMS App
Choose the app that you want to launch after receiving an SMS message
Transfer Settings and Data
This will enable you to backup and import your alert and account data. This can be used in several situations: 1. You have a new device 2. You want to format your existing device. 3. You have purchased the full version of the app and want to transfer your settings from the lite version. For the 3rd case, this transfer usually happens 'automagically'. However, sometimes during rollouts, the lite version can have a different DB format than the full version. When this happens, your settings will not automatically transfer. If you run into any issues, please contact support. The file created is an encrypted file with the extension ".ent" placed at the root of your SD Card. When you click on ".ent" file, it will automatically launch eNotify which will then import your data. [So once you have the file on the new device, you can click on it from a file explorer such as 'ES File Explorer' OR click on it inside an email for example]. Again, please be aware that from time to time the apps may have different DB versions. This is because lite users get new features first to ensure that paid users do not encounter defects or disruptions to their service. So you may sometimes, not often, have to wait before you can transfer your settings and data. Along the same lines, please be aware that .ent files from older versions of the app will no longer work if the new version of the app has a modified DB. I plan to address these issues in a future upgrade, but for now please contact support for advice if you encounter any problems doing a transfer. I can more than likely sort it out for you.
Action
This is the global action that will be taken for all notifications. It affects the system status bar notification and the pop-up notification. The options are {Mail/SMS, None, ENotify}. For example, when a new email arrives, do you want the notification to do nothing, open ENotify or Open the email app? If set to open email, then you can launch your email app from both the system status bar and pop-up notifications.
System Status Bar
When off eNotify will not send any Android system notifications to the status bar. By status bar, we mean the standard android notification widget that is typically accessed by a pull-down gesture at the top of the phone's screen. If you are using the pop-up notification you may well want to set "System Status Bar" to off otherwise you will be receiving a redundant notification. Note: If you turn both the "System Status Bar" and "Popup" off then eNotify will still perform an audio (or vibration) alert. Android Wear Users: Do *not* turn off system status bar notifications. Why? Google has mandated that we must send a summary notification to the phone in order to implement *stacked* notifications on the watch. Ideally, we would like to provide an option to turn off the phone notification however Google has given us no choice in the matter.
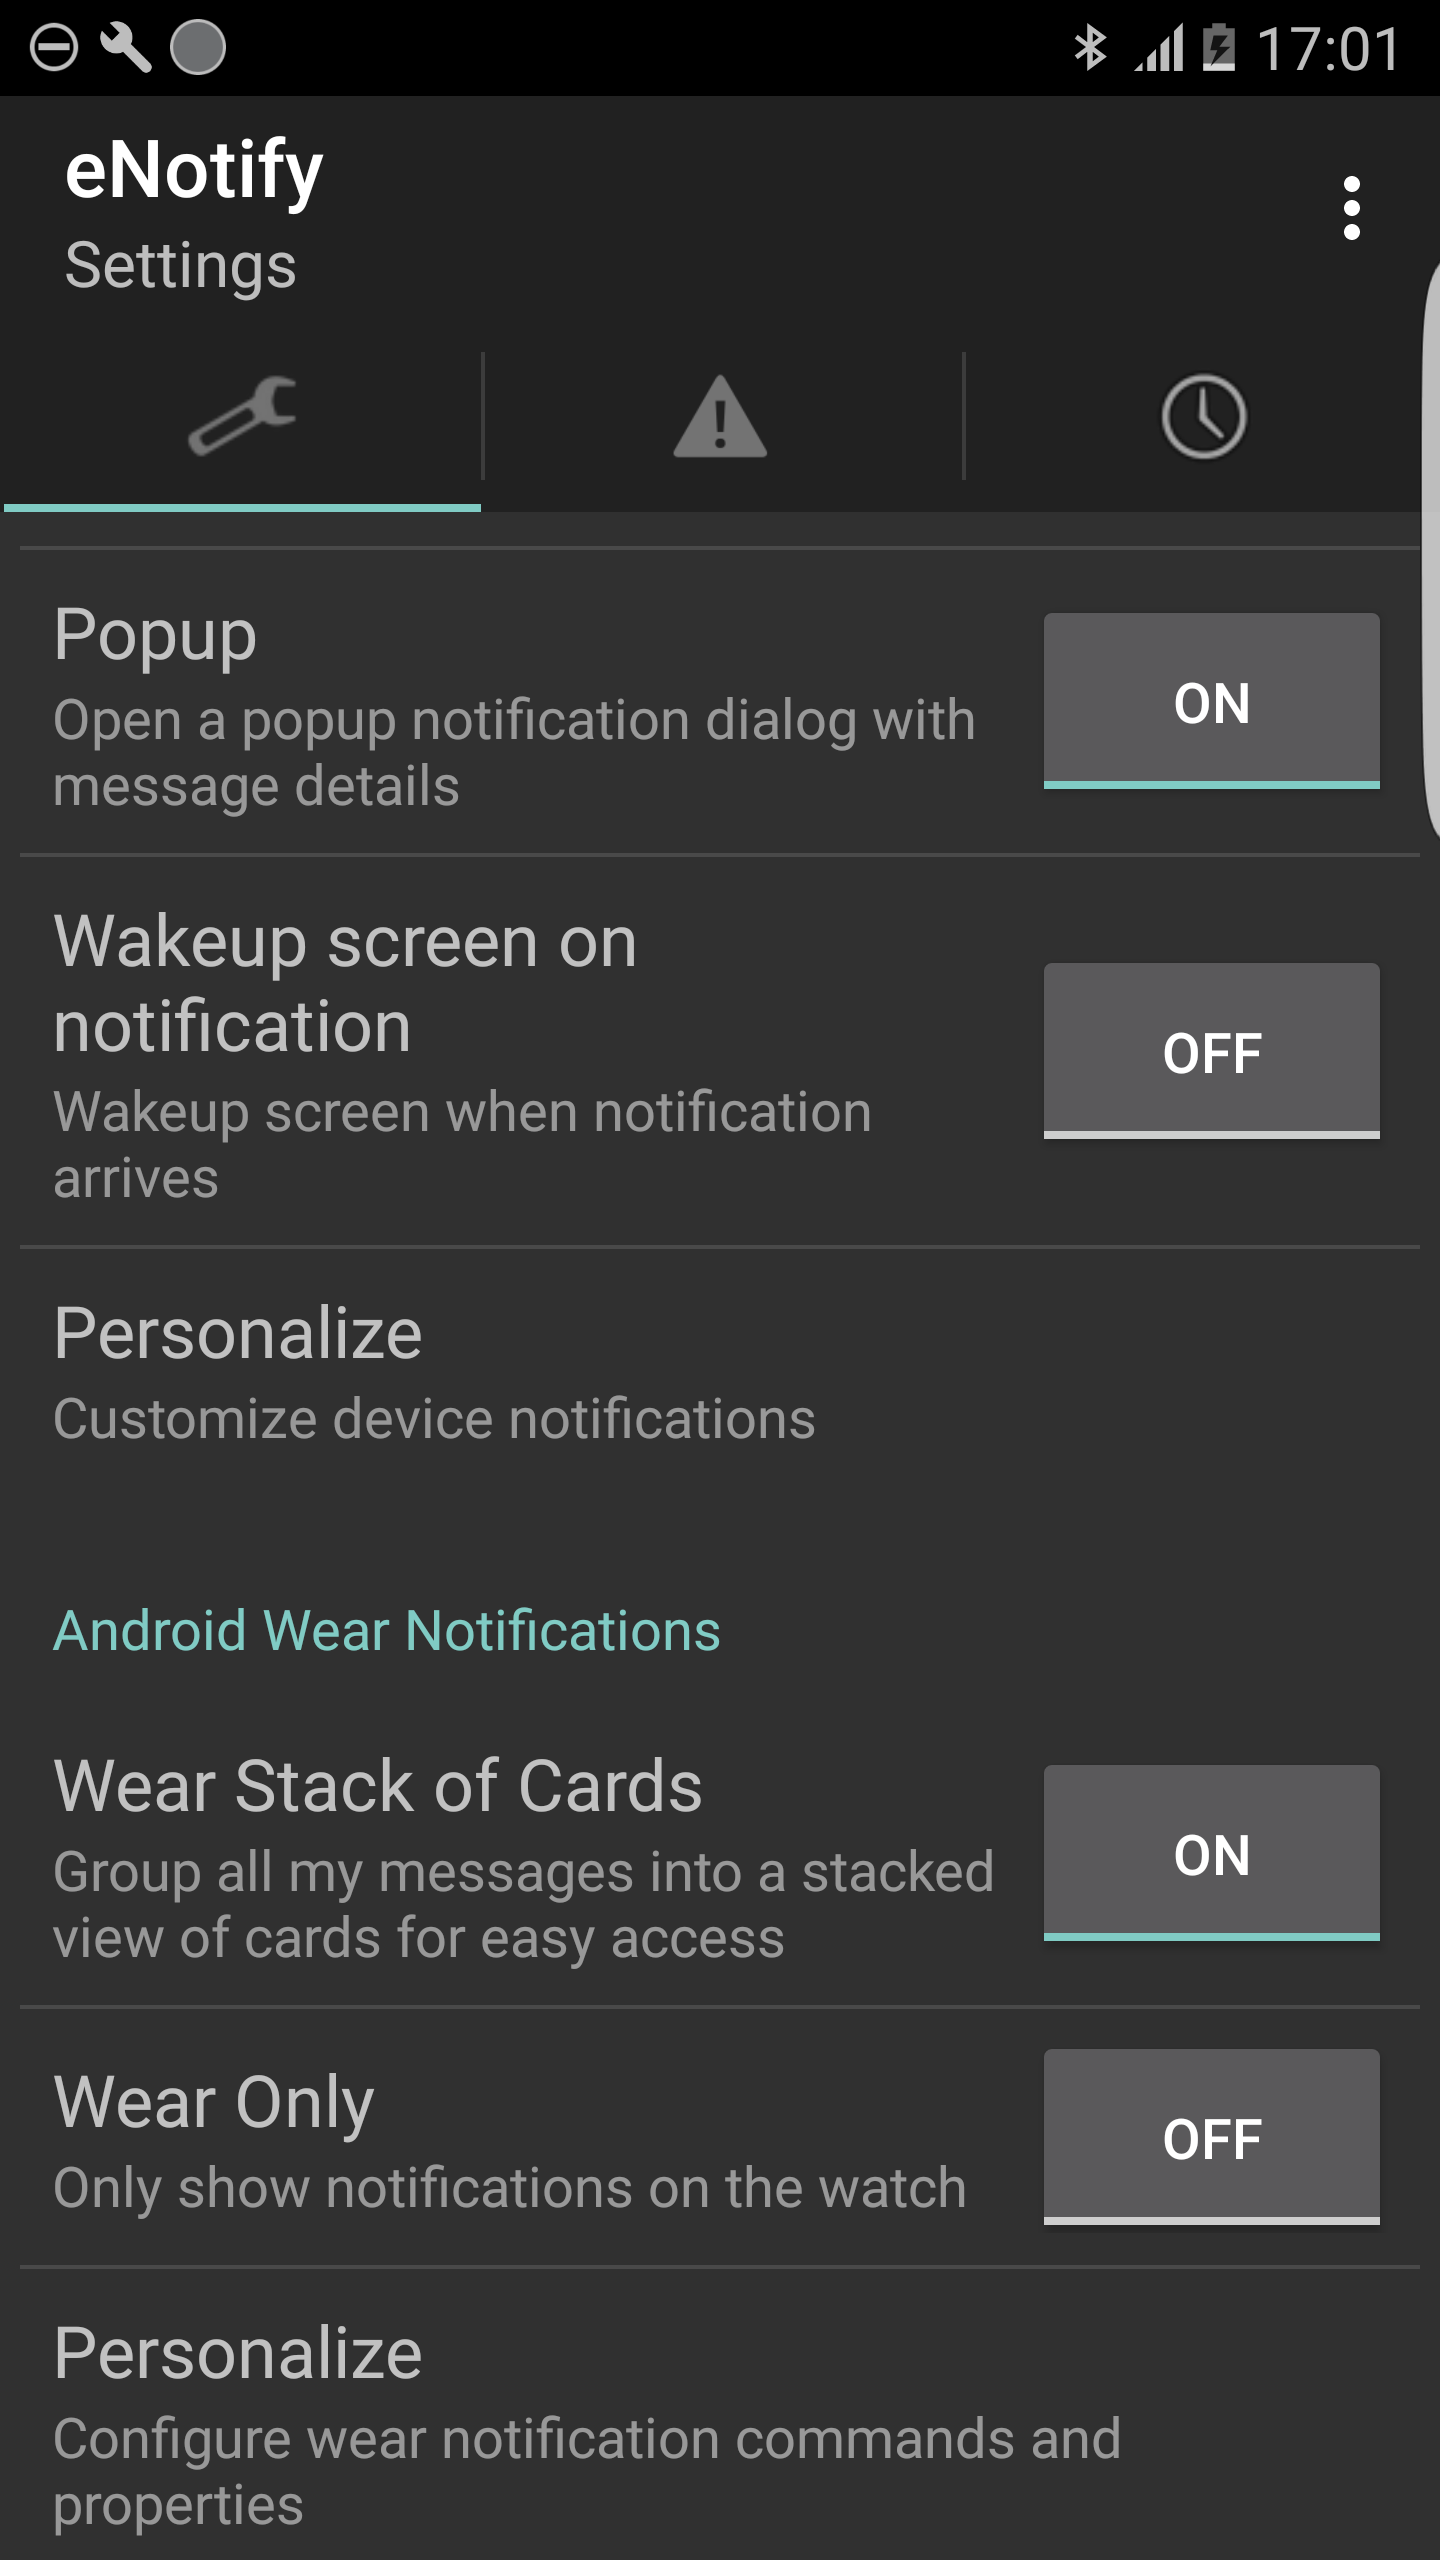
Popup
Turning the popup notification on, means you will receive a pop-up dialog whenever a new alert arrives. The dialog is implemented as an Android "View Pager". This means that when multiple notifications arrive, the alert dialog can be swiped left and right to reveal notifications.
Wakeup Screen on Notification
This turns on the screen and removes the screen lock when a notification arrives. Note: Please try avoid turning this option on because it will cause battery drain.
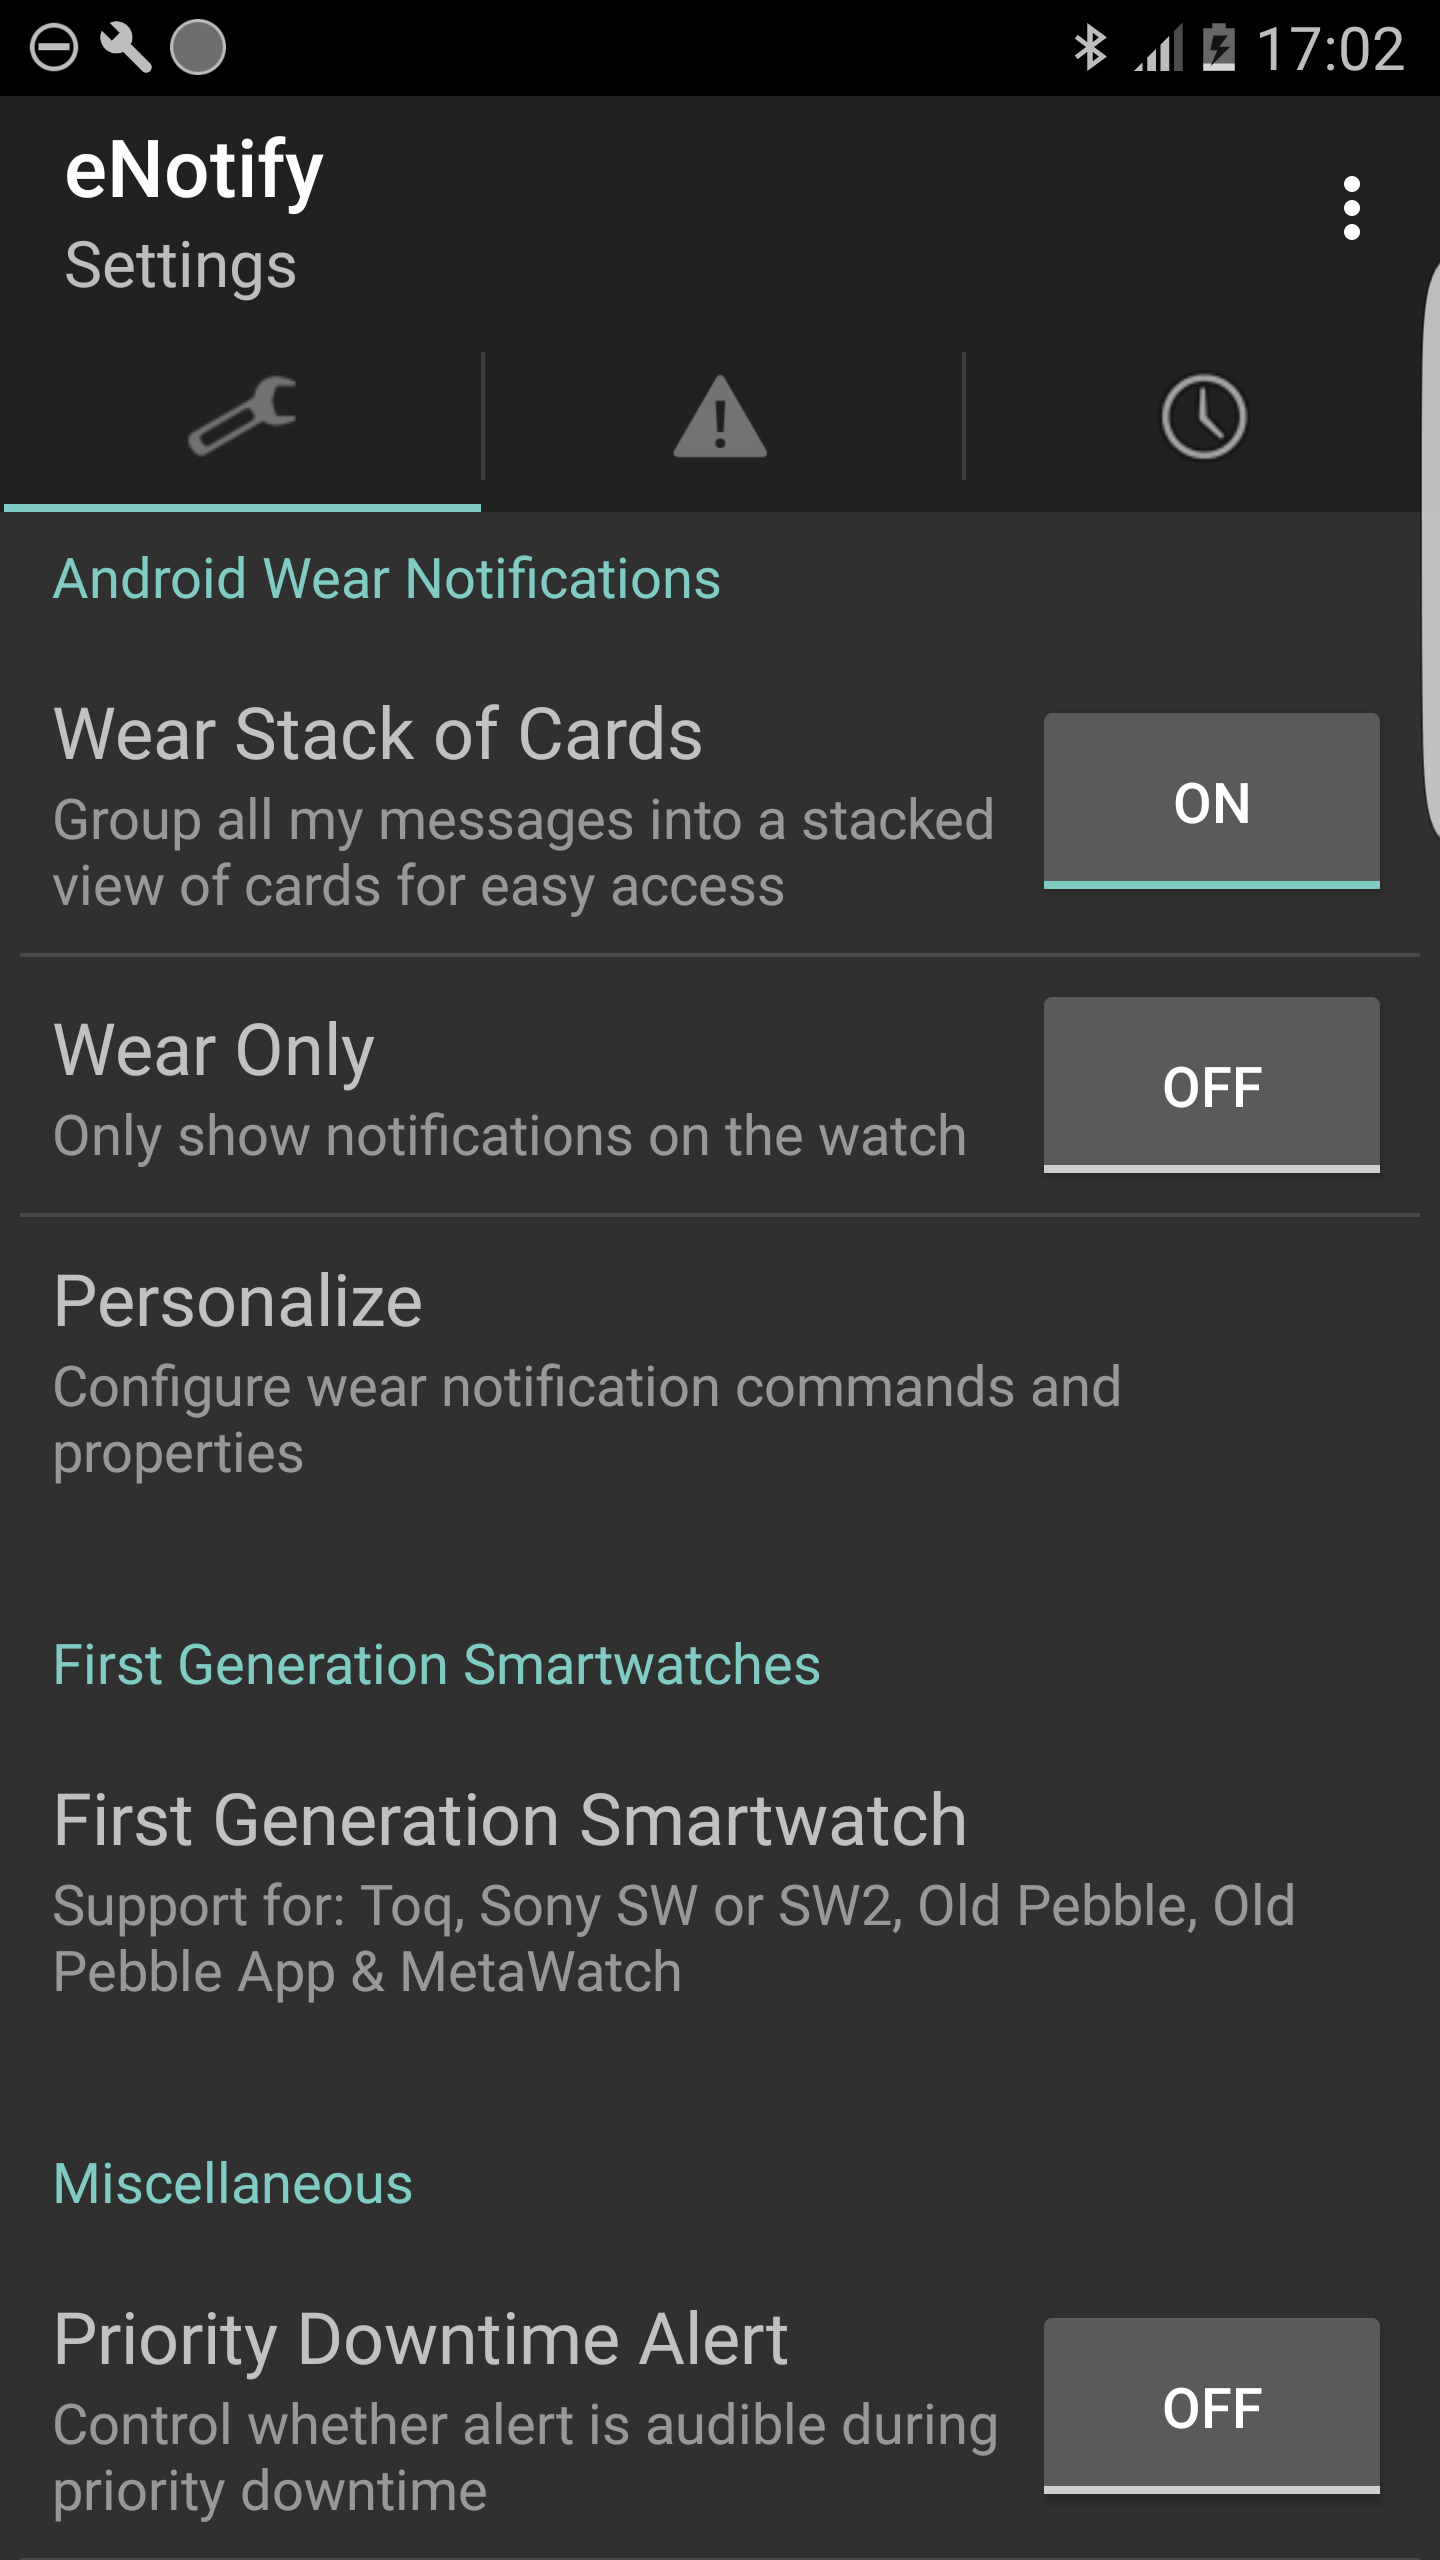
Personalize
This enables you to customize status bar and popup notifications.
Smartwatch or Accessory
You must set this option to ON if you have an Android Wear watch or other smartwatch such as Toq, Pebble or SW2. If you do not have a smartwatch or other accessory then turning this option ON is unnecessary but harmless EXCEPT that it causes the full email body of each message to be retrieved which uses additional resources and slows down message delivery by several seconds.
Master Switch: Watch Only
This is a convenience switch to disable all the phone's notifications regardless of any other settings in the app. The master switch can be used by Toq, Pebble & SW2 users to ensure that notifications are only delivered to the watch. This option is not available for Android Wear users. Why? Google has mandated that we must send a summary notification to the phone in order to implement stacked notifications on the watch. Ideally, we would like to provide an option to turn off the phone notification however Google has given us no choice in the matter.
Advanced Settings
These are settings that are seldom used or too specialized to be of any use to the typical user. If you have any questions on these setting please email support.
WIFI Sleep policy
This is the global WIFI sleep policy for your device. By setting it to never, you can ensure that eNotify is always using WIFI when available rather than the cellular data plan. Please be aware, that many Android devices will turn the WIFI radio off when idle to conserve power. When the WIFI radio is off, the device will automatically switch over to the cellular network.
View Log
This is where you can view the recent logs. It gives you a look under the hood to see what eNotify is doing. From this screen, you can slo email the logs to support. Please do not hesitate to do this if you are having any problems. We are happy to take on all issues.
Chapter II: Alerts

Profiles
Why are profiles useful? Typical profiles are {Work, Home} or {Week, Weekend}. It lets you setup a completely different set of alerts with different characteristics. As an additional example, you can create a 'vacation/holiday' profile that only enables the most important emails to come through. Touch the profile row to change it. Once the profile has changed, the alerts below refresh so that only alerts for the selected profile are shown. To add additional profiles, click the '+' action in the top right hand corner.
Email Alerts
Click on the alert to personalize it. In here you can change the sound, vibration and other characteristics. You can also control when it is fired. For example, you can change the alert to only fire when your spouse emails. Default Alert. The default alert is pre-crated when you install eNotify. It is the *only* alert that has no option to add triggers or schedules. Why? This is done so the the default alert matches *all* emails. When you first install eNotify, this is the alert that causes 'Bell Chime' to play for each and every email. I don't want an alert sound for each email. That's fine. Open the default alert and set it to Disabled. Warning: Unless you create additional alerts you will not receive any notifications once the default alert has been disabled. Adding Alerts: Tap the '+' button in the top right hand corner to add additional email alerts.
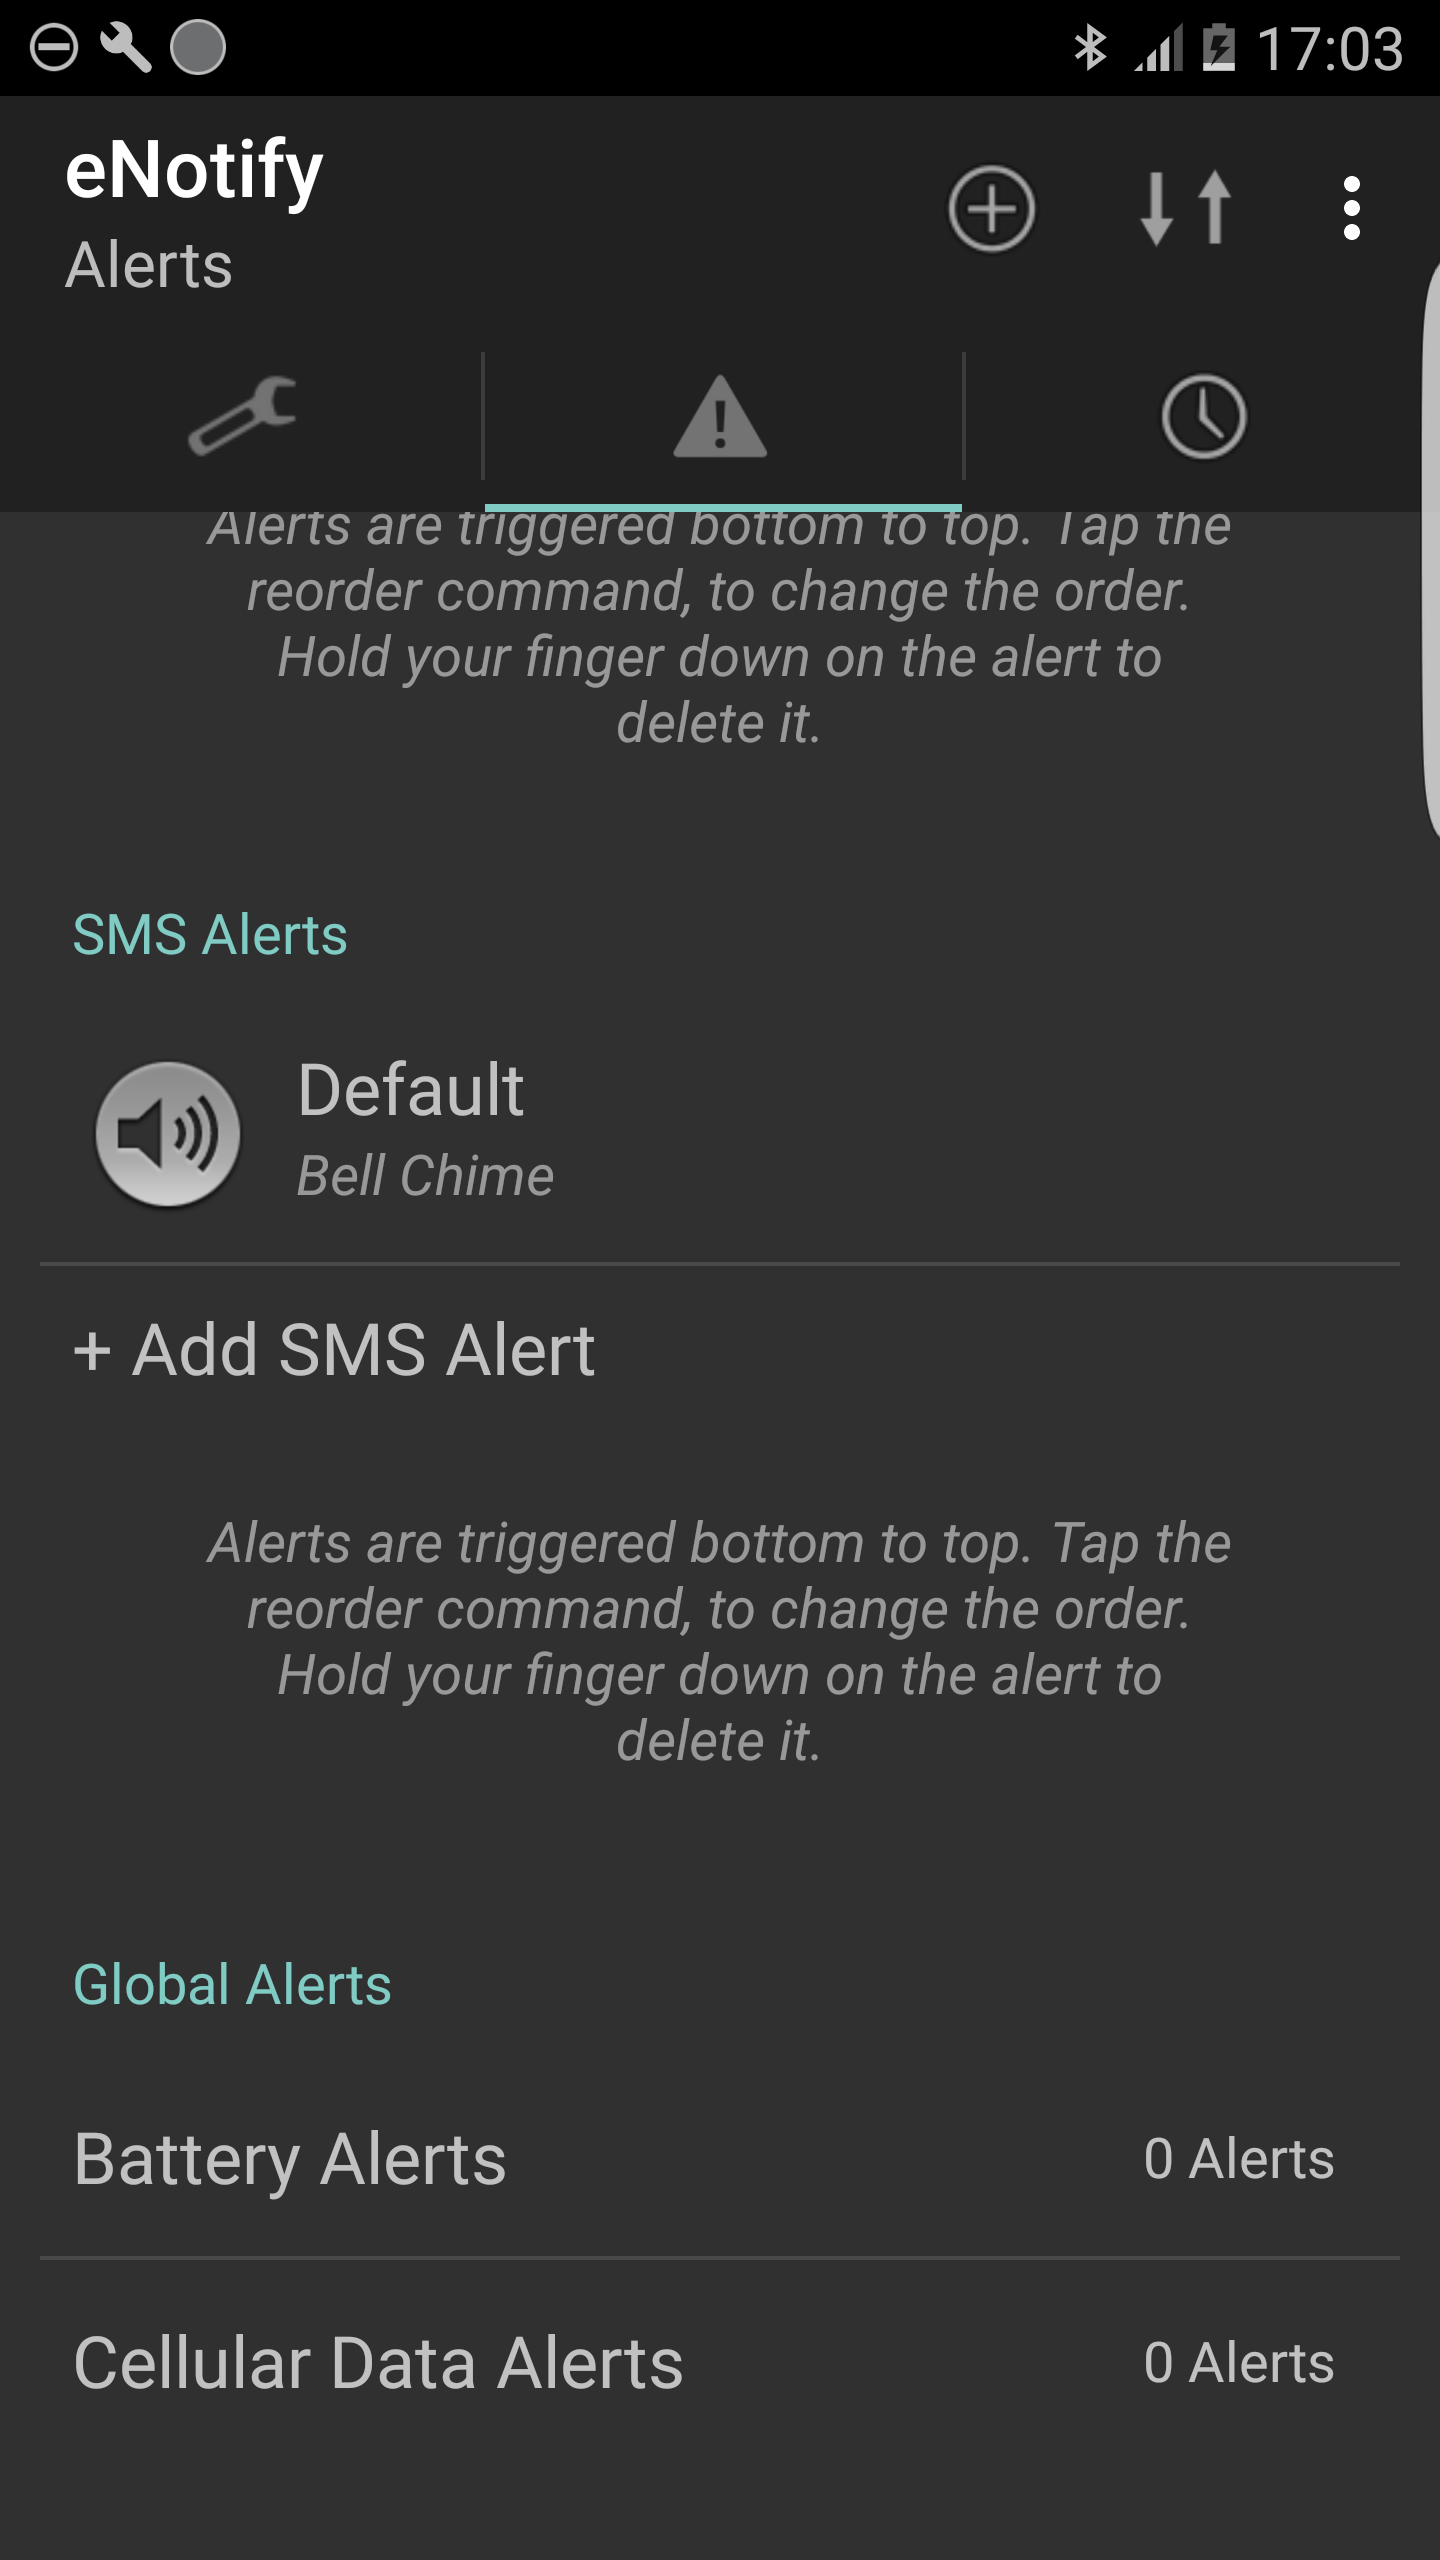
SMS Alerts
See the above section for email alerts. SMS alerts function in the same way, but are only triggered when SMS messages arrive.
Battery Alerts
While no longer part of the core mission of eNotify, you can set battery alerts by clicking here. For example, play the "Godzilla" sound when my battery falls below 20%.
Cellular Data Alerts
While no longer part of the core mission of eNotify, you can set data alerts by clicking here. For example, play the "Godzilla" sound when I've used 2 Gigabytes of data for the month. [Please note: You want to check out Settings -> Data on your device since Android devices now ship with similar capabilities]
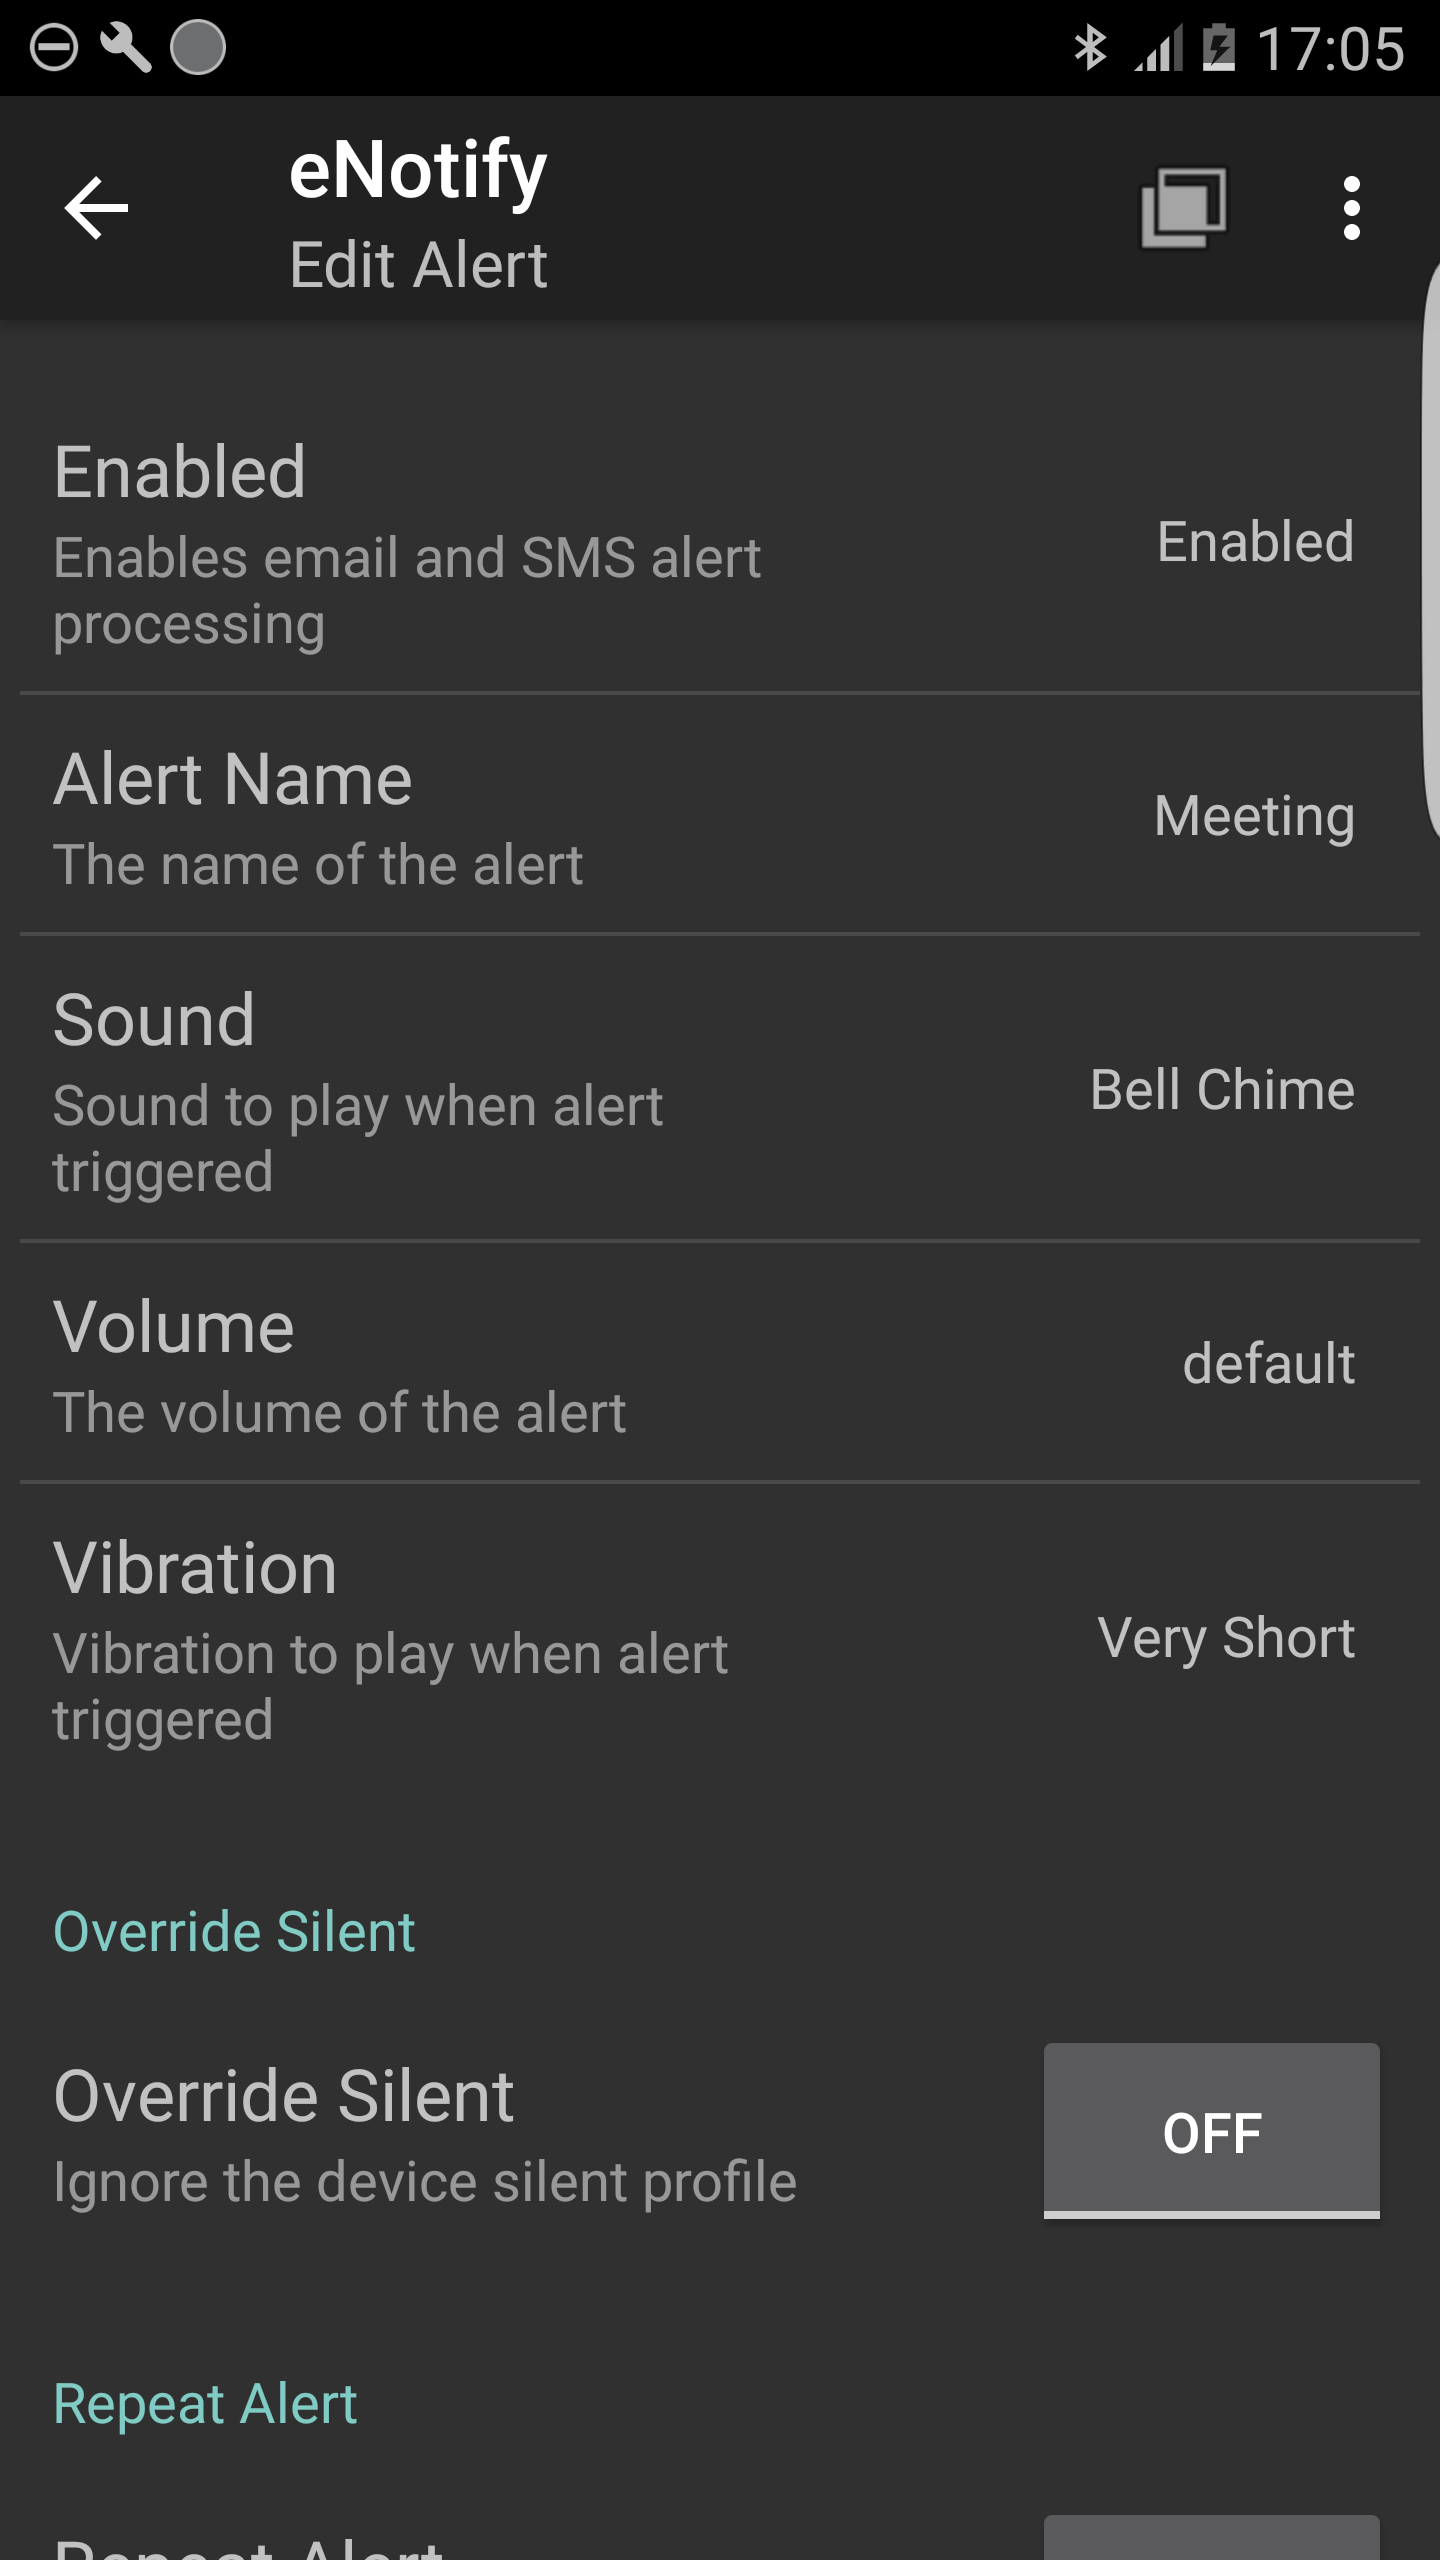
Enabled
There are 3 options for the Enabled setting: {Enabled, Disabled, Ignore} - Enabled: The alert is active - Disabled: The alert is inactive. This setting can be used to temporarily disable an alert. Disabling an alert is convenience so that you don't have to delete the alert and recreate it. - Ignor: This is an advanced setting. The majority of users can ignore 'ignore'. It is similar to disabled, but with one very big difference. Ignored alerts are active, but when matched do nothing. Why is this useful? It enables you to create a negative alert that stops alert processing. Example: if you have alerts (A, B). Alerts are evaluated from the bottom up so B is evaluated then A. If B fails to trigger then A will be evaluated. If alert B is set to 'Disabled' it is not evaluated so A is always evaluated. However, if B is set to 'Ignore' AND it matches then it will prevent A from being evaluated because alert processing stops when a match occurs.
Alert Name
Choose any name that you want for the alert. This simply helps you remember the alert and its purpose.
Sound
There are several options for the sound to play when an alert is triggered: - Silent: When set to silent, you receive visual notifications, but no sound - Text To Speech: Reads the message aloud using your device's text to speech capabilities - User Sound: Record or add your own sound - Baked in Sounds: eNotify supplies hundreds of sounds from professional to humourous - Device Sounds: Notification sounds that eNotify found on your device
Override Silent:
Ignore the silent profile on your device and play the alert sound Why is this useful? It can be used for priority Alerts. Scenario: You put your phone into silent mode before sleeping, but any alerts sent from the hospital can be set to override silent Tip: you can also set the override volume to ensure the sound is sufficiently loud
Vibration
Tip: you can also set the override volume to ensure the sound is sufficiently loud
Vibration
Set a vibration pattern to issue when an alert is triggered: - None:The device will not vibrate - User Vibration Pattern:You can record you own by holding down the record button. At the moment, you can only record a single vibration. We may add the capability to create more complex patterns in the future. - Baked in Vibration Patterns:eNotify supplies a number of baked in patterns with descriptive names such as : {Short, Long, Short Short, ...}
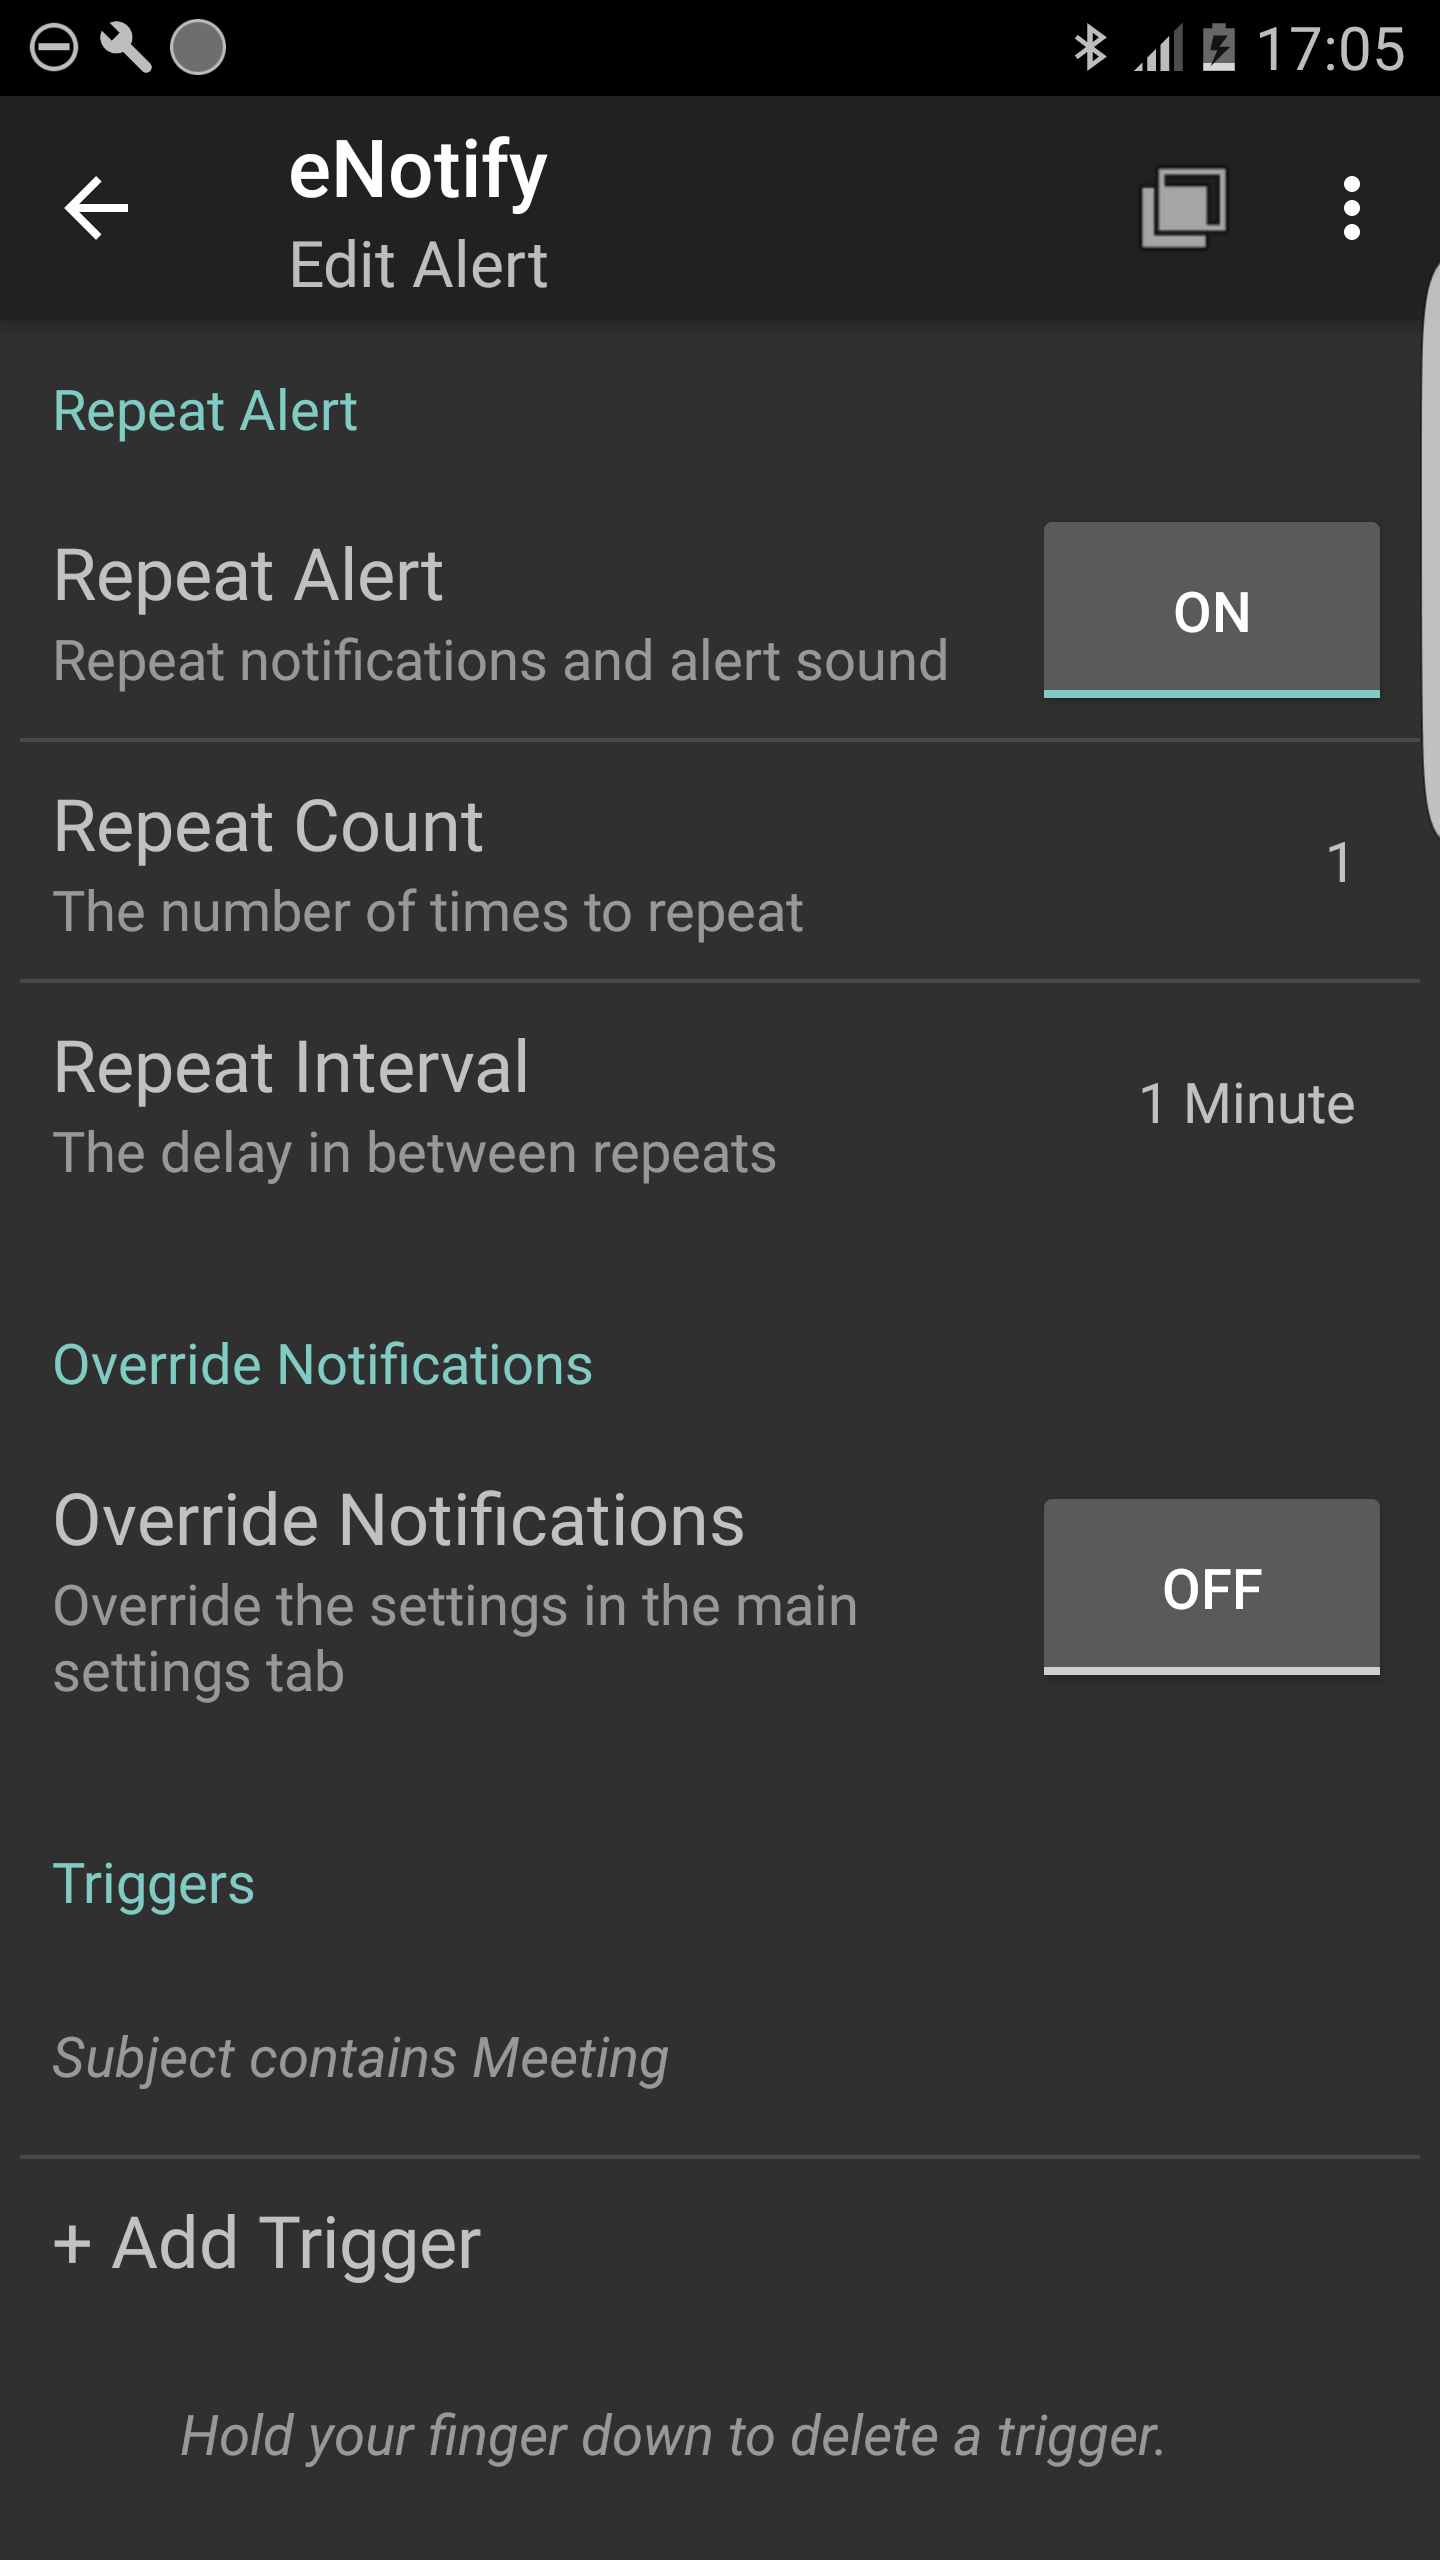
Repeat Alert
When set to ON the alert will repeat Please be aware the eNotify cancels repeating alerts as early as possible. What does this mean? It means that we take any opportunity to cancel all pending repeats. The repeating sound will be cancelled when: there is interaction with the Status Bar, Popup, App OR a command is issued from a smartwatch. The purpose of these repeats is to call attention to the fact that there is a notification. Once that job is complete, no further repeats occur.
Repeat Count
The app offers repeat options of {1, 2, 3, 4, Until the App opens}: - Please be aware 1 is the number of repeats. When set to 1, it means the alert sound will play twice: once when the message arrives and once when it repeats. - Until the App Opens: Repeat forever until there is interaction with the app. The repeating sound will be cancelled when: there is interaction with the Status Bar, Popup, App OR a command is issued from a smartwatch.
Repeat Interval
The app offers repeat interval options of {1 minute, 2 minutes, 5 minutes, 10 minutes, continuous}: Please see Repeat Count above for the conditions under which the repeat is cancelled.
Override Notifications
This enables the overriding of the global ON/OFF settings for notifications. There are options on the main settings page: "Popup", "Status Bar" and "Smartwatch or Accessories". These are global options. However, you can change the options for individual alerts. This facilitates use cases like: Example] I don't like popup notifications in general, but when a message comes from my boss I want it to be shown in the popup -> Set Override Notification to ON and Popup to ON Example] I don't want all messages coming to my Pebble watch. I only want ones from my partner -> Set Override Notifications to ON AND Smartwatches & Accessories to ON
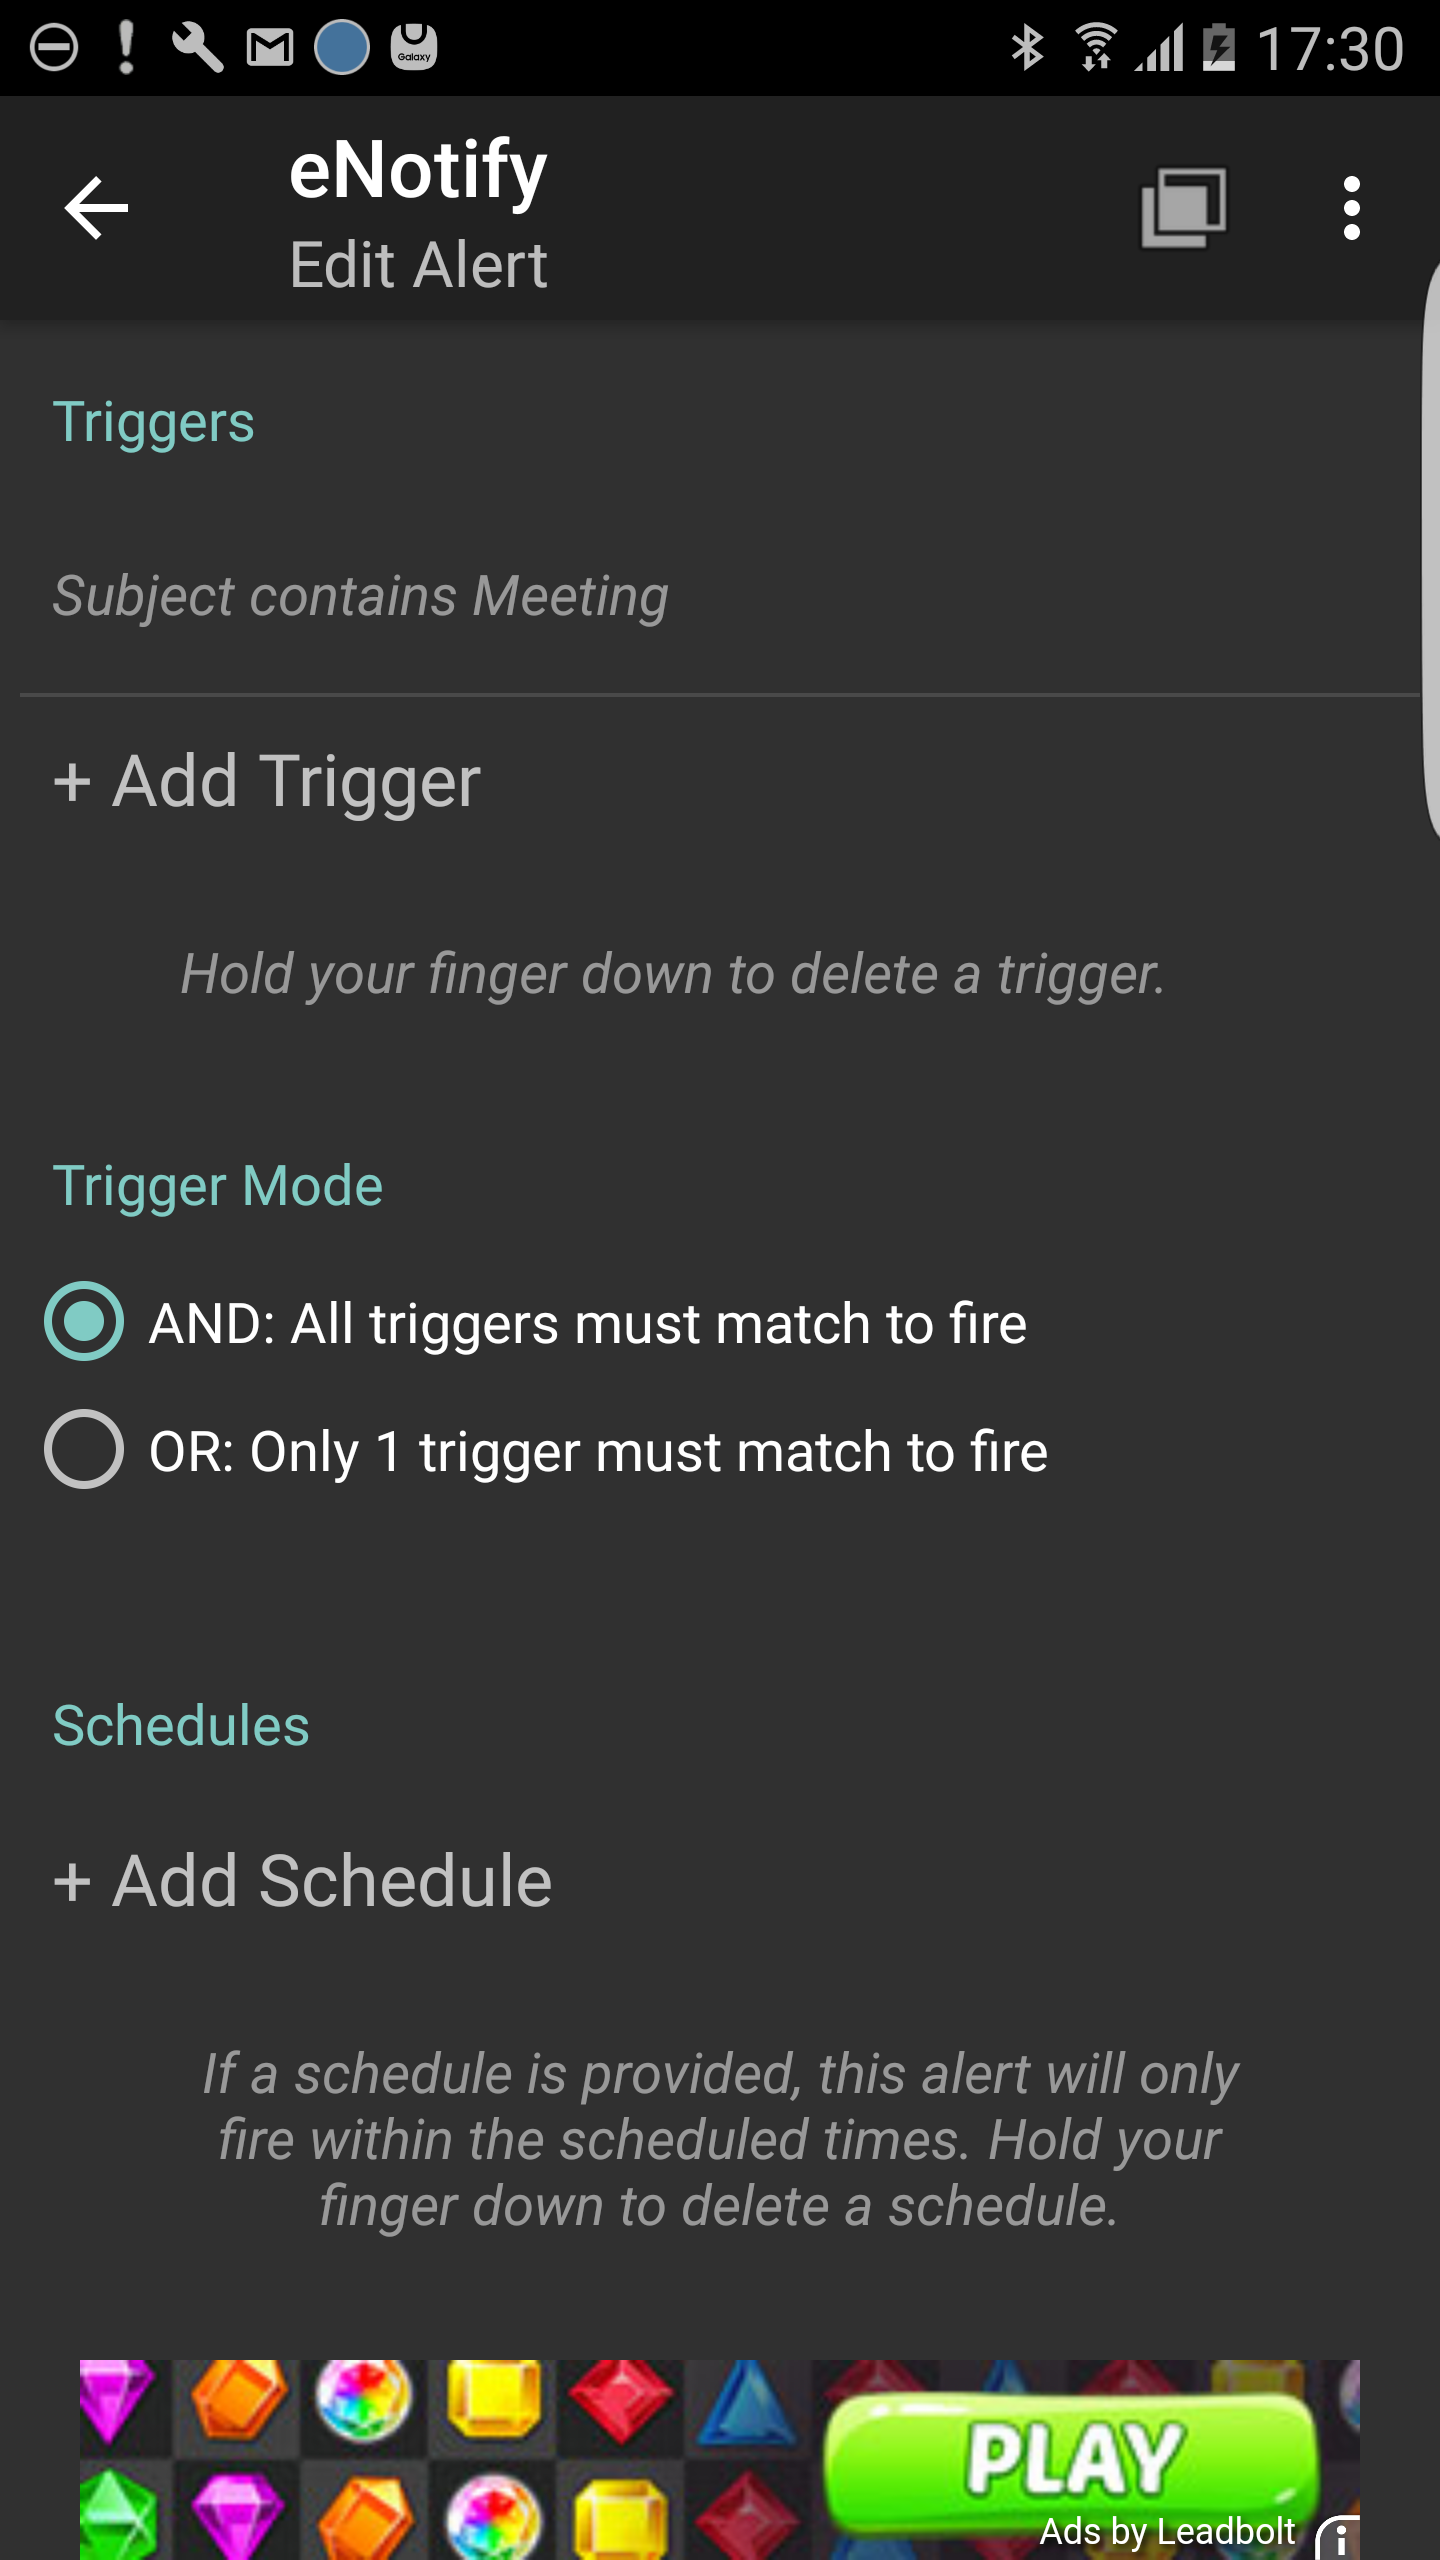
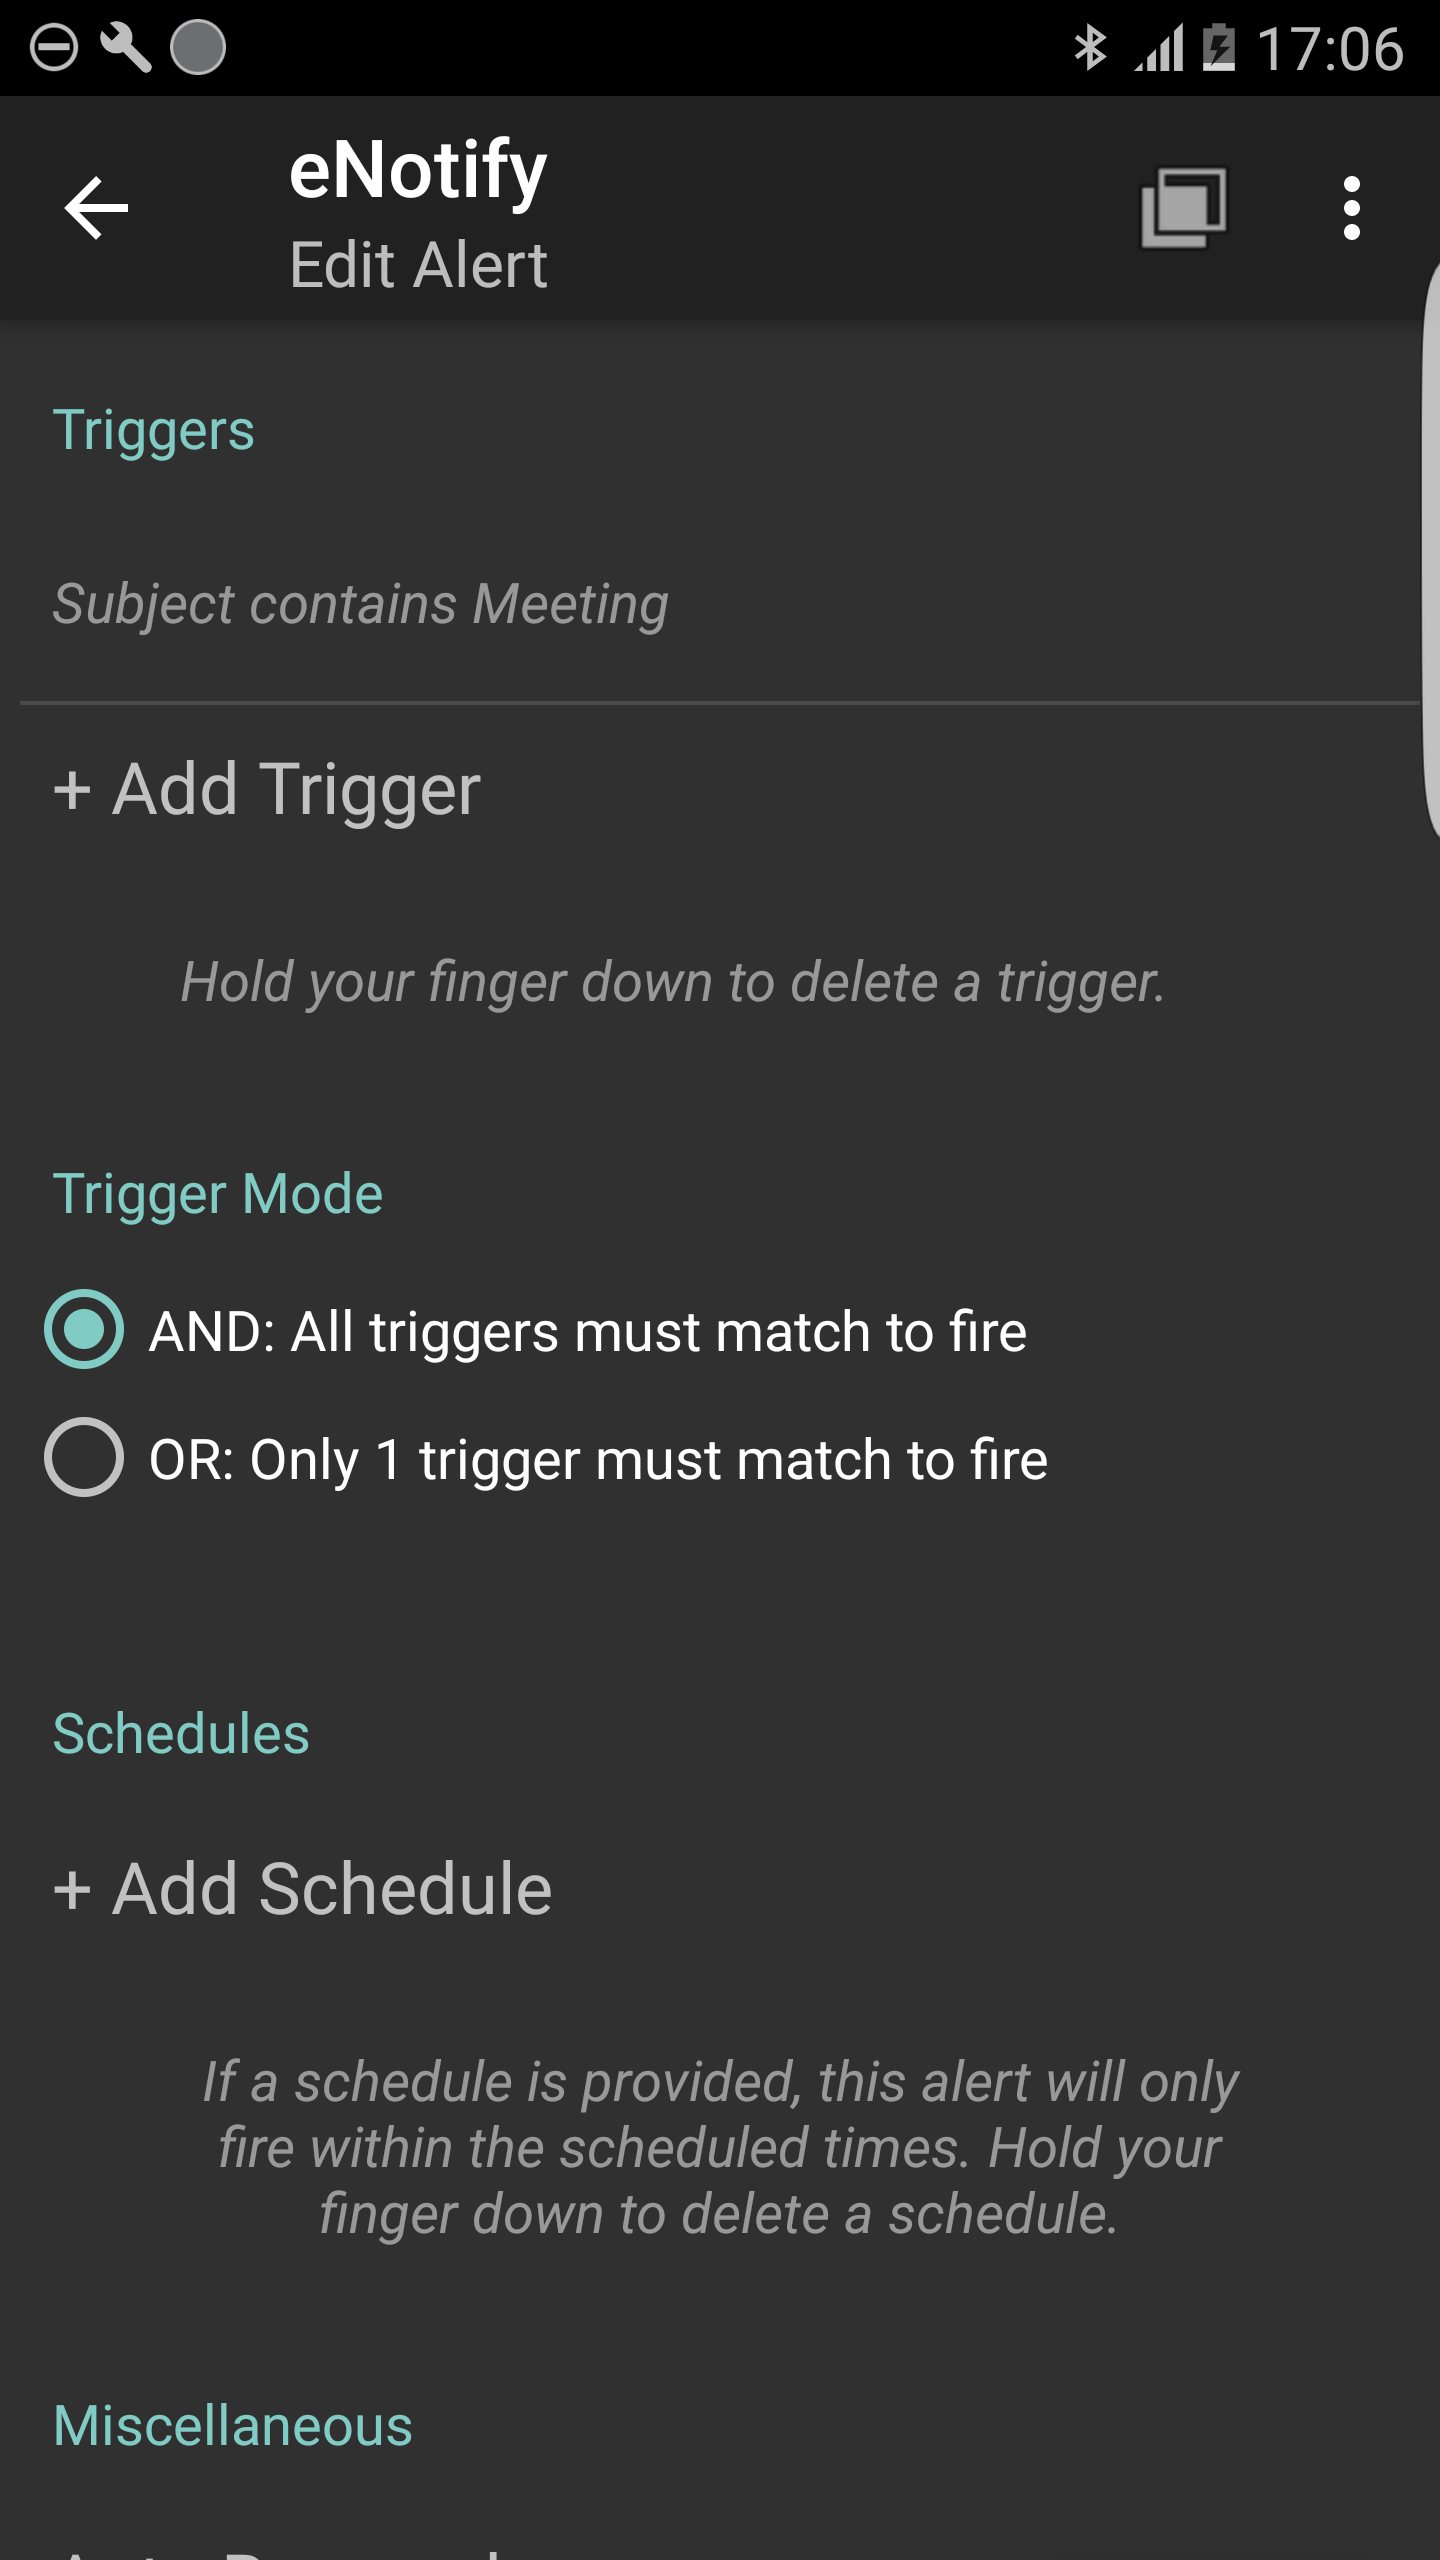
Add Triggers
Triggers are conditions that must be met for the alert to fire. Sample triggers: - Subject is 'meeting' - Sender is 'john.smith@yoonka.com' In general, triggers match as liberally as possible. They are not case sensitive AND match any sub string. What does this mean? If the trigger is for a subject of 'meeting' it will match emails with the following subjects: {meeting, MEETING, MeEtIng, MEETING NOW, MEETING-NOW, MEETINGNOW} For sender and recipient triggers the situation is much the same. You don't necessarily need to enter the full email address. For example, instead of making the sender trigger 'john.smith@yoonka.com' you could instead make it 'John', but it will trigger the alert whenever someone named John sends you an email. The triggers are designed to match without being fussy. So if you are unsure just enter something in there and give it a quick test. The triggers in red are more expensive and could cause battery drain. Please try avoid scanning the email body. This is very expensive. If you do scan the body then be smart about it. The app uses short circuit evaluation. What does this mean? It means that once an alert matches it stops evaluating alerts. So make sure that alerts that contain any red triggers are at the top of the list. Why? Because alerts are evaluated from the bottom up so by putting expensive alerts at the top ensures they are evaluated less frequently.
Trigger Mode
- And: All triggers must match. Example] 'Subject is meeting' and 'sender is john.smith'. The message must be from John Smith and contain a subject of meeting for it to fire. - OR: Only 1 trigger must match. Example] 'Subject is meeting' and 'sender is john.smith'. The message must either be from John Smith OR contain a subject of meeting for it to fire. So only one condition must be true for it to fire.
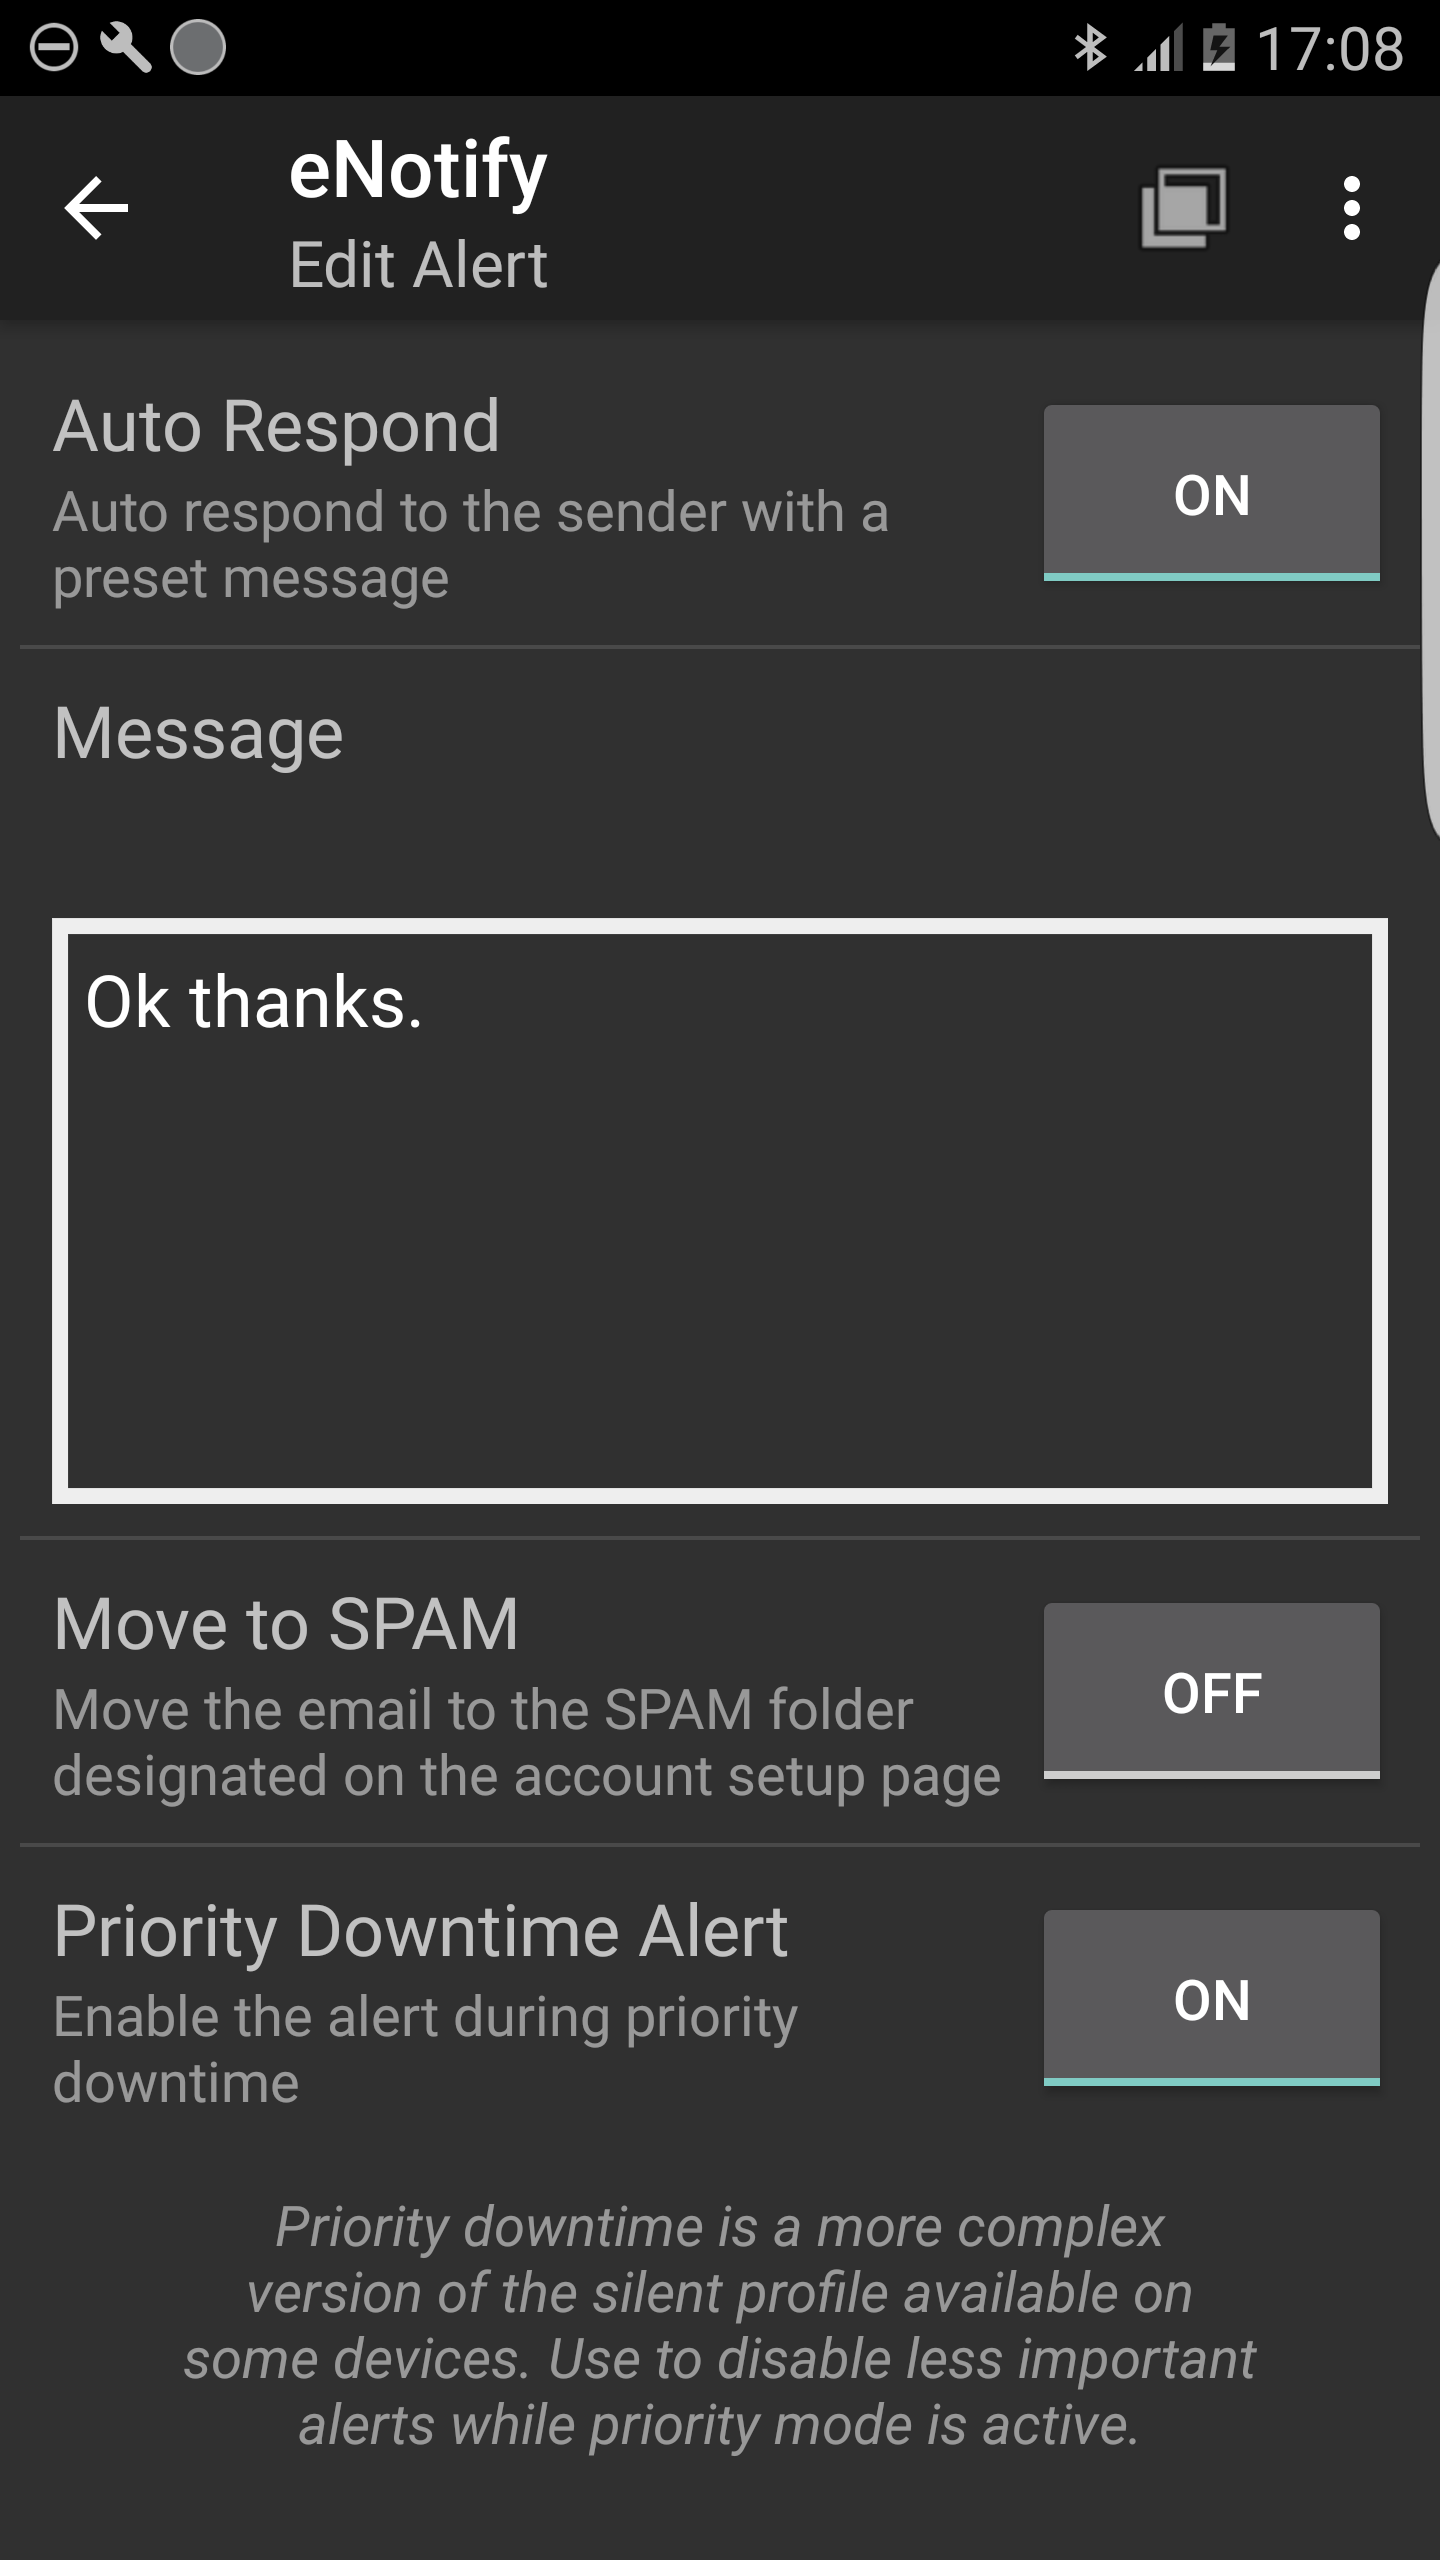
Auto Respond
This enables you to auto respond with a preset message
For example] I could set a message of "Thanks. I will contact you as soon as possible" whenever my boss emails.
Note: Auto replies are not repeated. It ignores the repeat settings. So if you're repeat count is set to 4, it still only sends 1 auto reply.
Chapter III: History

History
This screen shows the history of the all the notifications that eNotify has issued. It can be used to see notifications that you may have missed or already dismissed. Please note there is an 'incognito' mode available from the menu key [Click the | in the top right hand corner]. When incognito is on, no history is shown.
Let’s work together!
Power up businesses with next-level software consulting and top-tier IT talent! ⚡🎮
Contacts
The quest continues — join us on social media!
Copyright © 2025. All rights reserved.